For MetaTrader 4 & MetaTrader 5
Seven take-or-skip checks, each proved on a real arrow as it forms in the MetaTrader 5 Strategy Tester, two quick tests, and sixteen markets played to the end: forex, metals, crypto, indices and oil. Fourteen minutes.
Most traders run a crossover indicator, a separate supply and demand tool, a manual risk calculator and an alert add-on. Four moving parts that never quite agree. You spot the cross, squint at where the zones are, do the stop and target math by hand, and miss the entry while you were calculating.
Flintridge Trader Pro collapses all four into one engine. A close-MA versus open-MA crossover (ALMA, Hull or TEMA) fires the entry, confirmed by a higher timeframe and gated by an EMA-144 trend filter, an RSI-28 filter and a signal cooldown. Swing-based supply and demand zones frame the context and convert to a Break of Structure marker the moment they break. And the instant a signal prints, a trade state machine projects the stop-loss and three take-profit lines forward on the chart, then tracks every hit on the dashboard.
No black box. Four mechanical stages, every one computed on closed bars. The same sequence on EURUSD M30, gold M15, Bitcoin H1 or the S&P 500 H1.
A moving average of closes crosses a moving average of opens. Because it reads candle bodies rather than absolute levels, it turns earlier than a classic dual-MA cross.
The cross is read on the previous closed bar of a higher timeframe (chart timeframe x 8 by default). The forming bar never generates a signal, so nothing repaints.
BUY only above the EMA-144, SELL only below it. RSI-28 blocks overbought buys and oversold sells. A cooldown stops rapid duplicate entries.
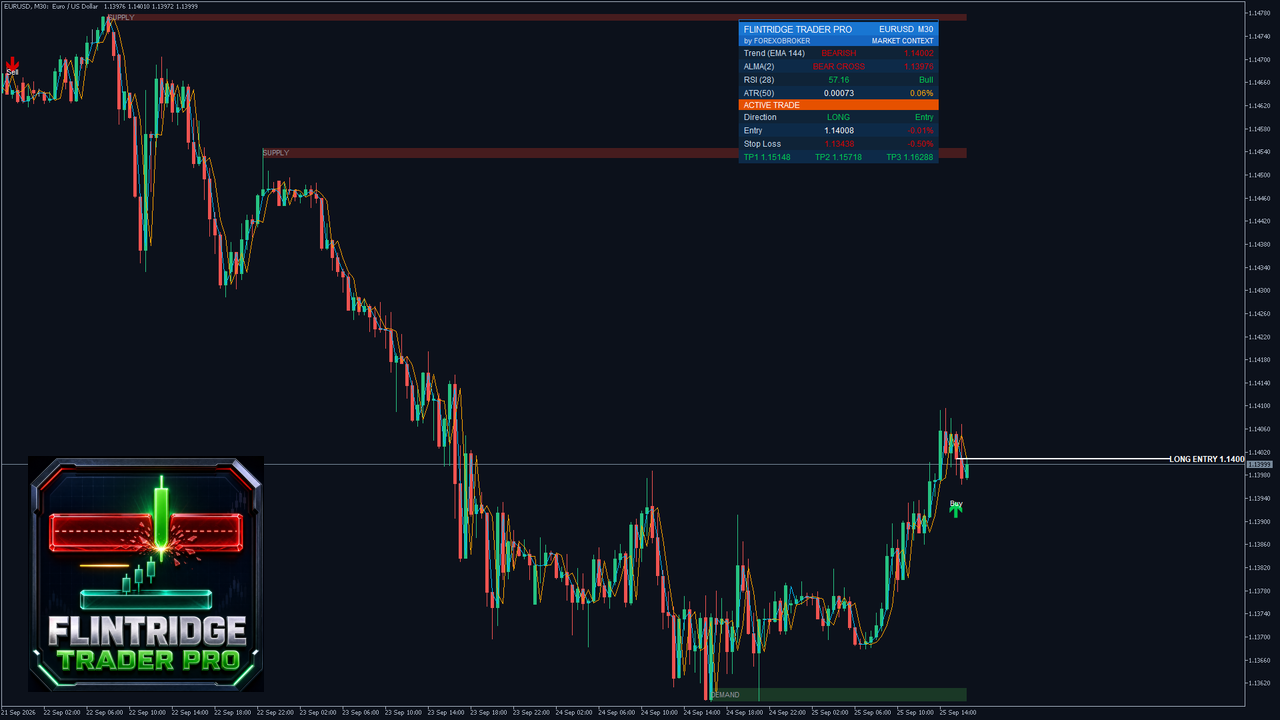
An arrow prints with the entry, a 0.5% stop and 1% / 1.5% / 2% targets drawn forward. The dashboard tracks TP1, TP2, TP3 and SL until the trade ends.
A clean crossover is only the start. To trade it you need context to filter the noise, a risk plan to manage the position, and a non-repainting engine you can trust. All three are built in.
A close-MA vs open-MA crossover with three selectable smoothers: ALMA (default), Hull or TEMA. Optional Heikin Ashi source, a delay offset, and higher-timeframe confirmation at a multiplier you choose.
Swing-based zones (swing length 10, keep 20, ATR-scaled width) labelled SUPPLY and DEMAND, with an automatic Break of Structure marker the moment price closes through a zone.
Every signal ships with a percentage stop-loss and three take-profit lines projected 40 bars forward, plus live hit-tracking and an open P&L readout on the dashboard.
A complete decision system: signal, confirmation, filters, structure, risk and monitoring. The same engine on MetaTrader 4 and MetaTrader 5.
Reads candle-body direction, so it reacts earlier than a lagging two-length MA cross.
Three smoothing engines. ALMA balanced, Hull fastest, TEMA smoothest.
Signals come from a higher timeframe (chart x 8 by default), read on closed bars.
BUY only above the EMA, SELL only below it. Switchable.
Blocks buys above 65 and sells below 35. Thresholds are inputs.
A minimum number of bars between entries (15 by default) filters noise.
Swing-based zones with SUPPLY / DEMAND labels, ATR-scaled, 20 kept on the chart.
A broken zone becomes a dashed BOS line, so you see where structure gave way.
0.5% stop, 1% / 1.5% / 2% targets, all inputs, drawn forward 40 bars with price labels.
TP1, TP2, TP3 and SL labels print on the bar each level is reached.
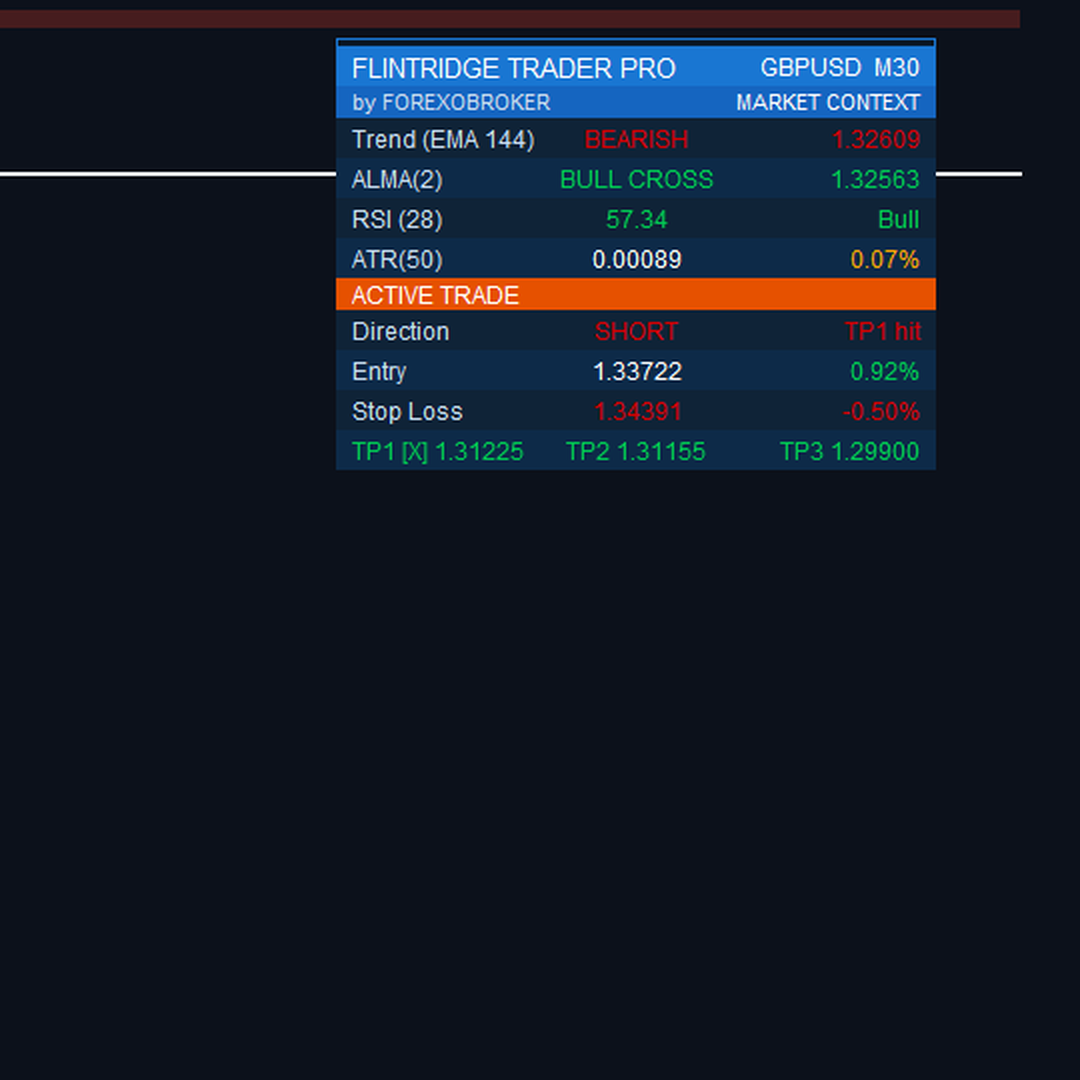
Trend, cross state, RSI, ATR, direction, stage, entry, live P&L, SL and the three targets.
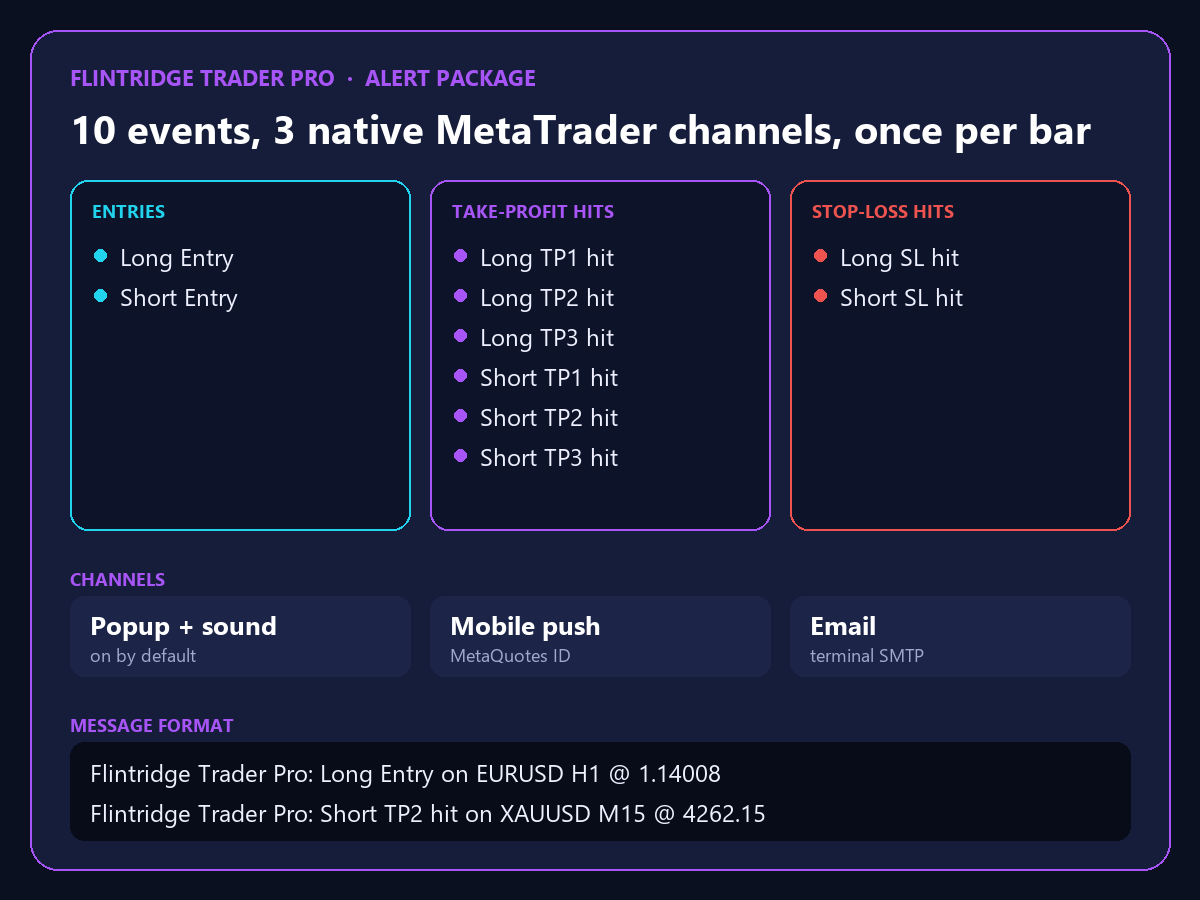
Long/Short entry, six TP hits and two SL hits via popup, push and email.
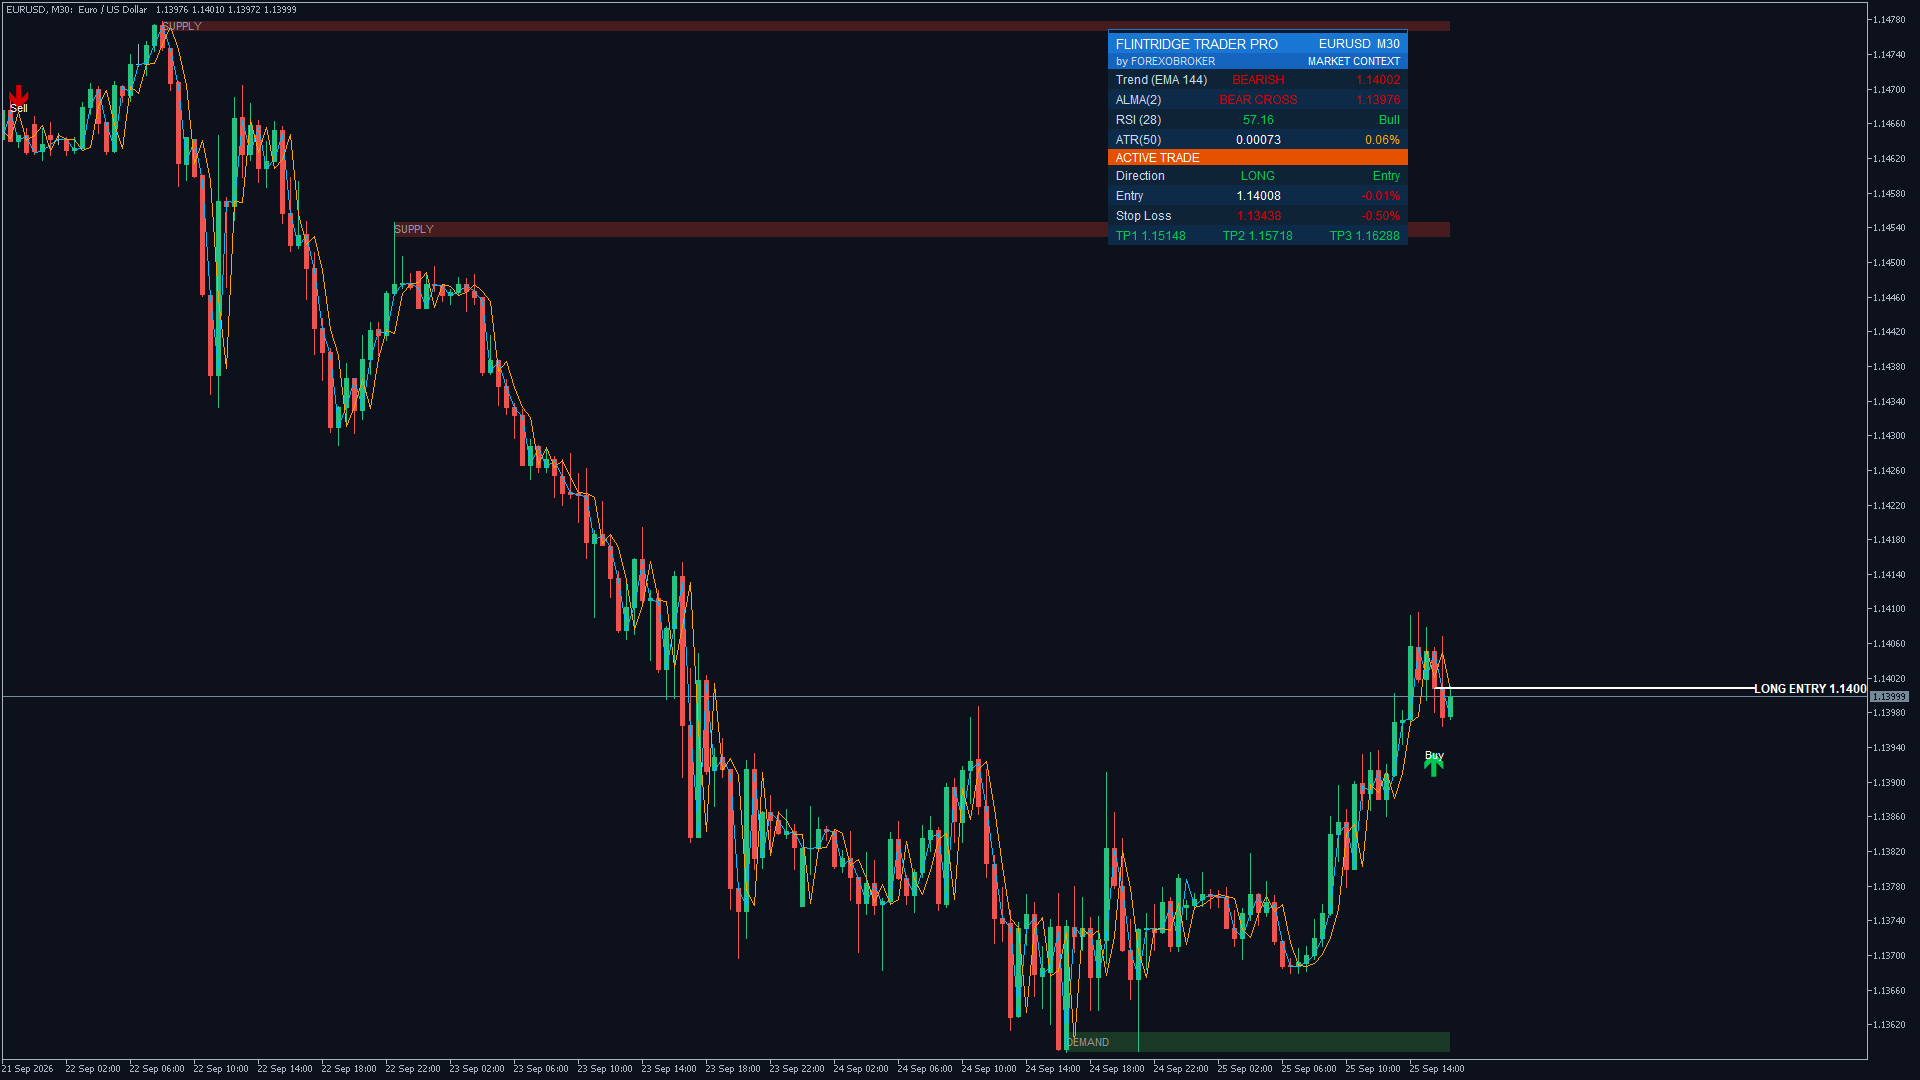
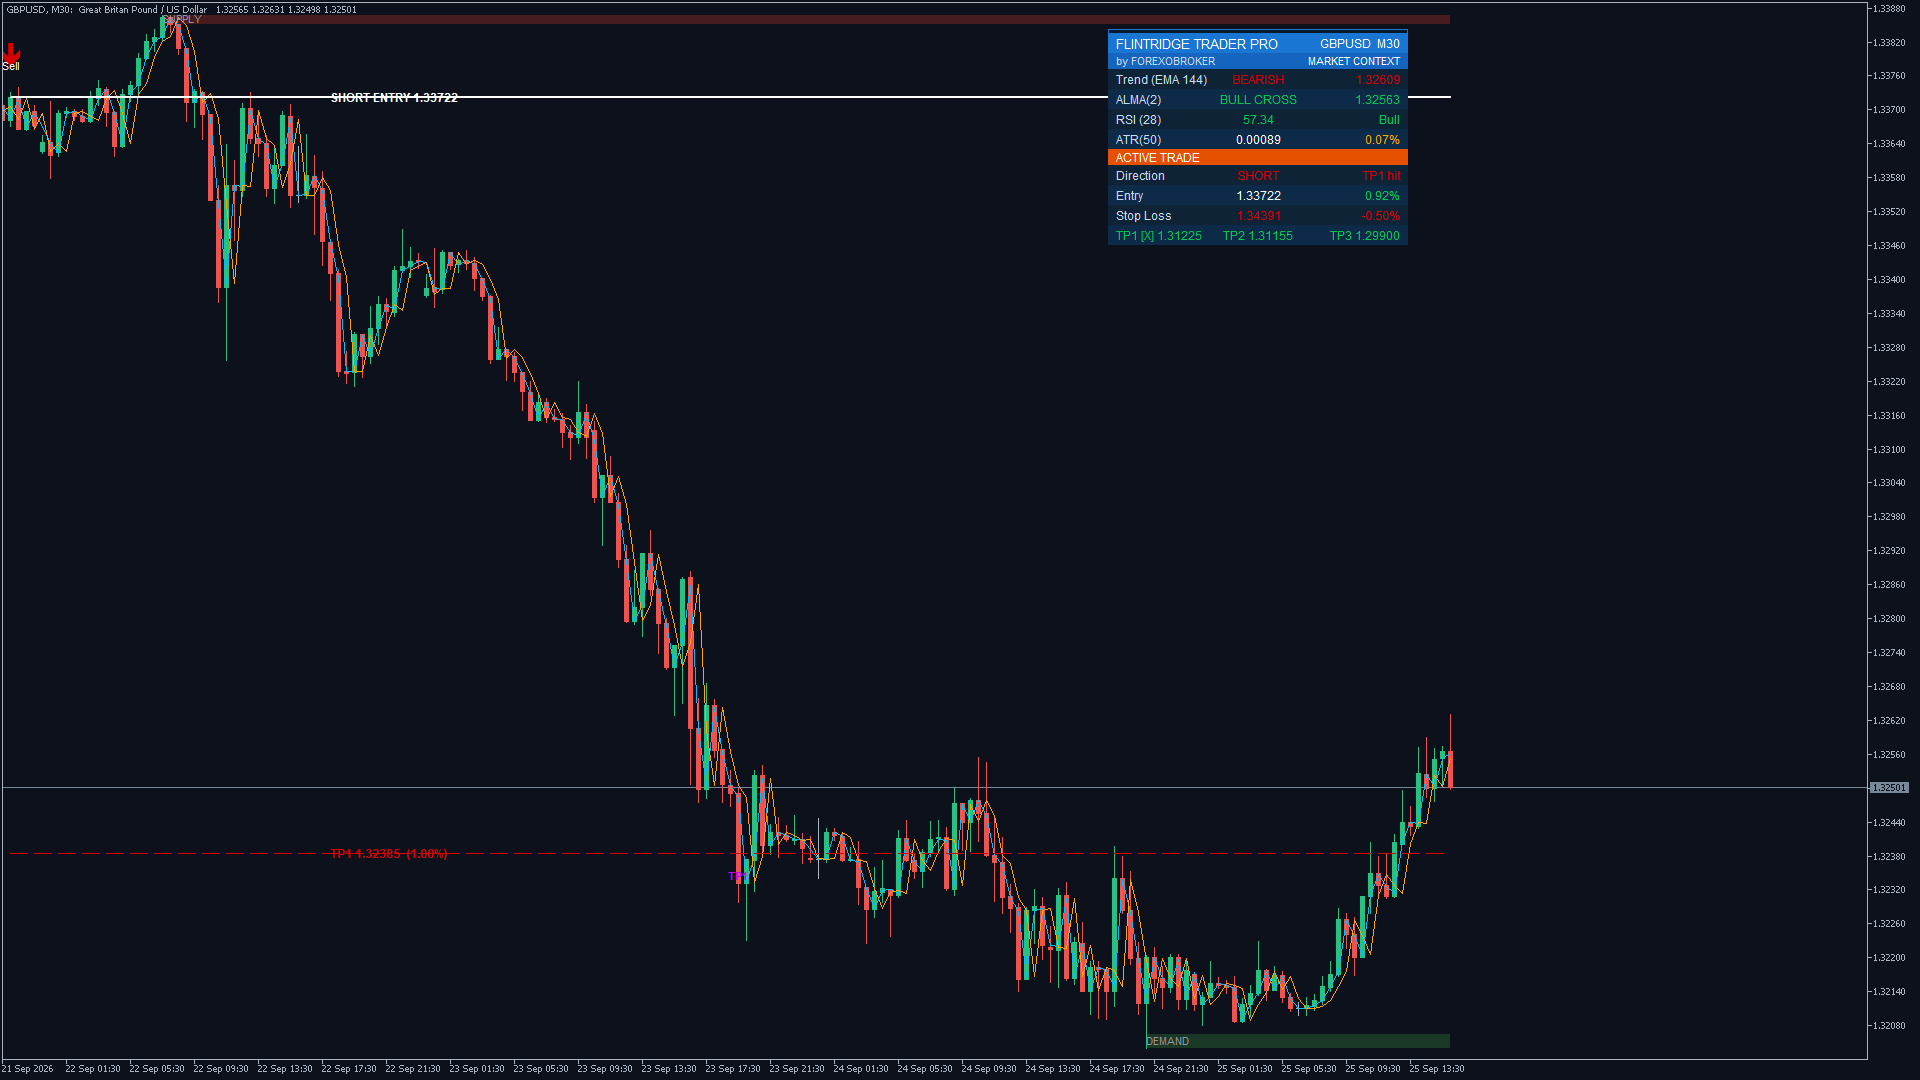
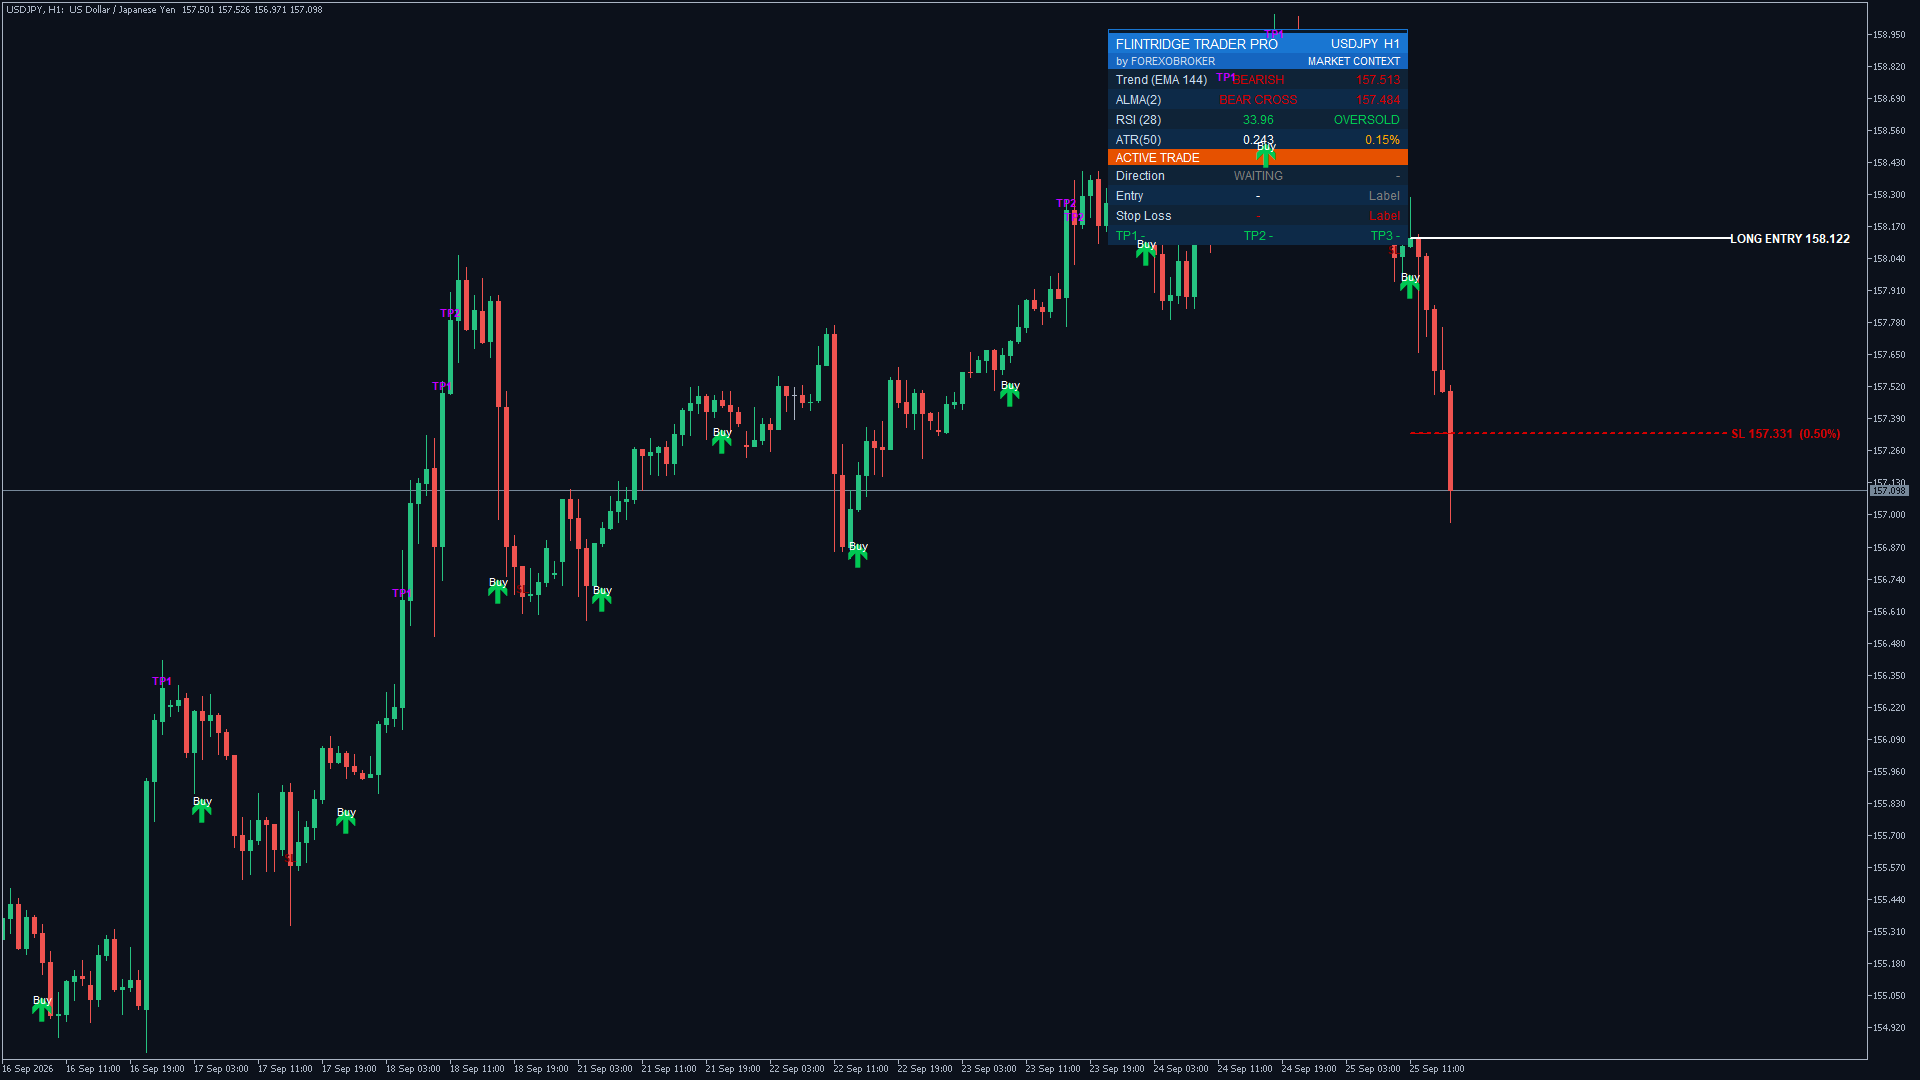
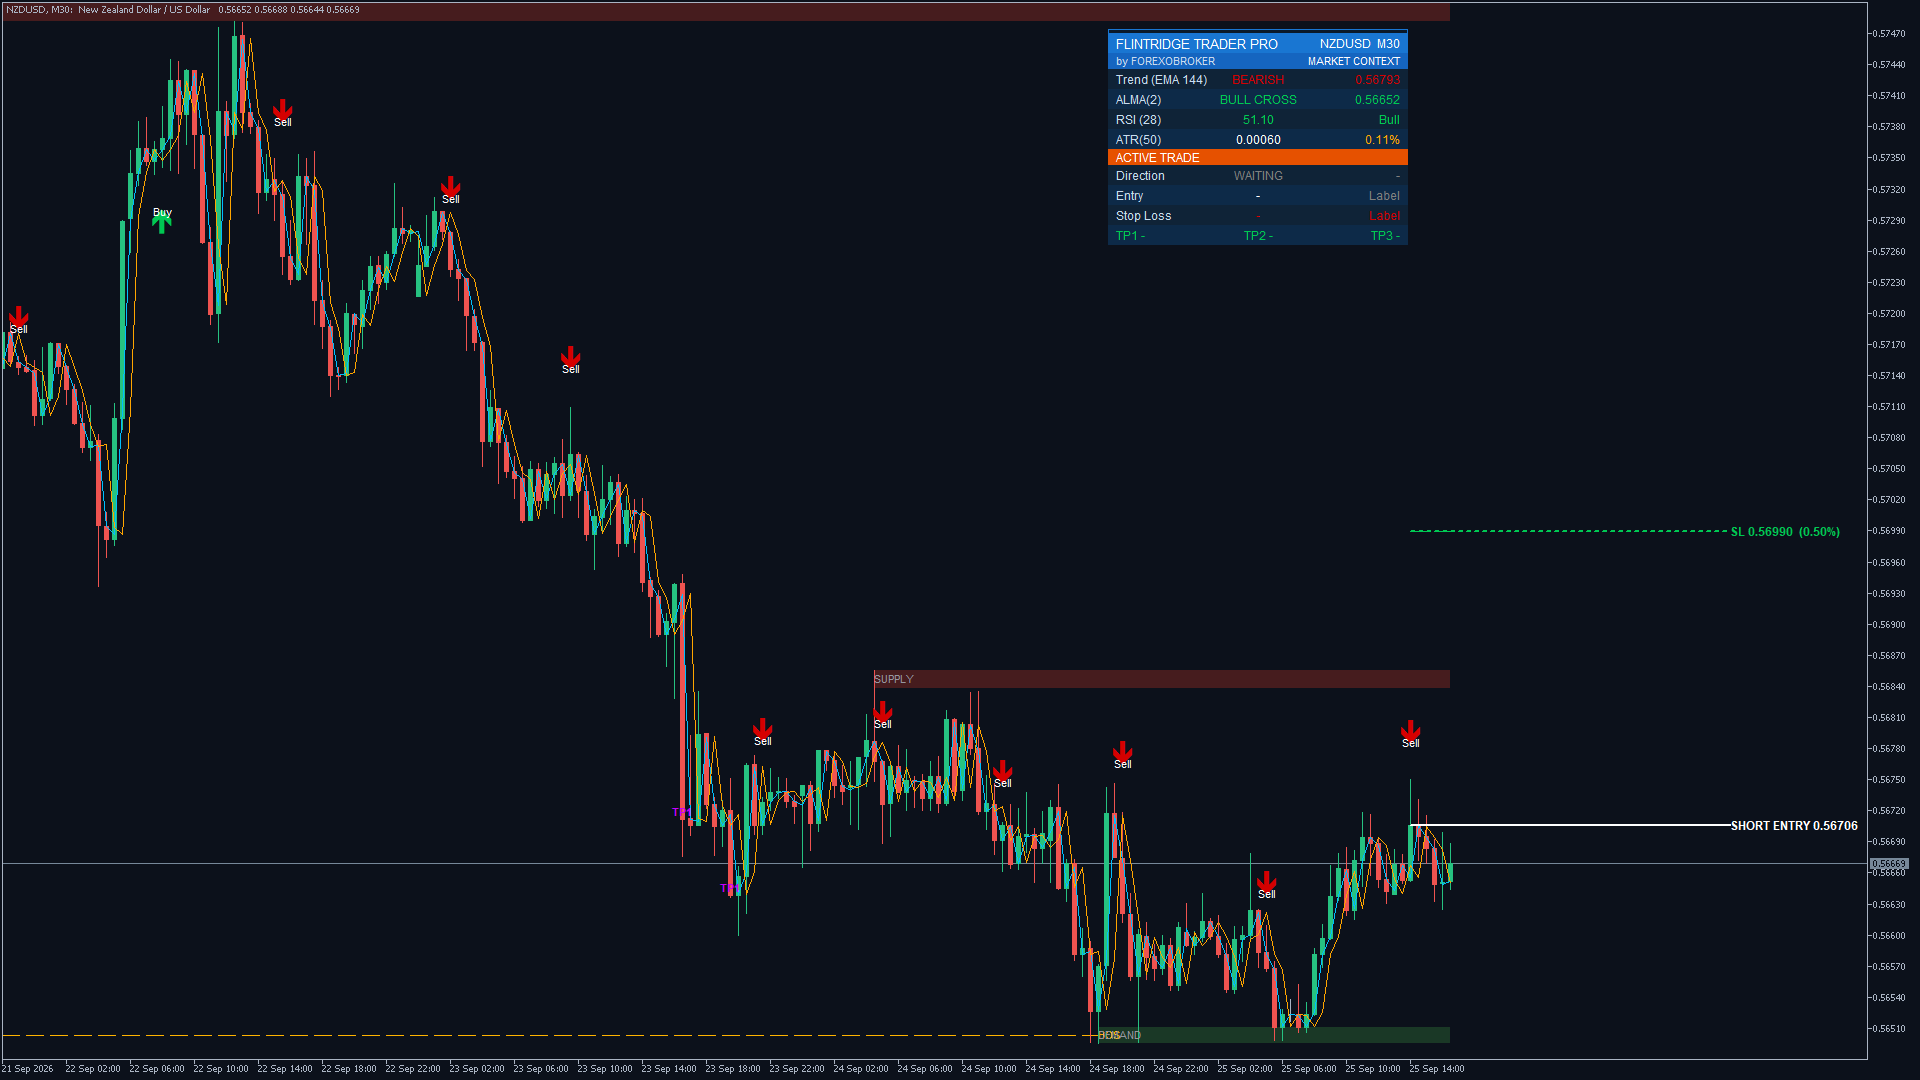
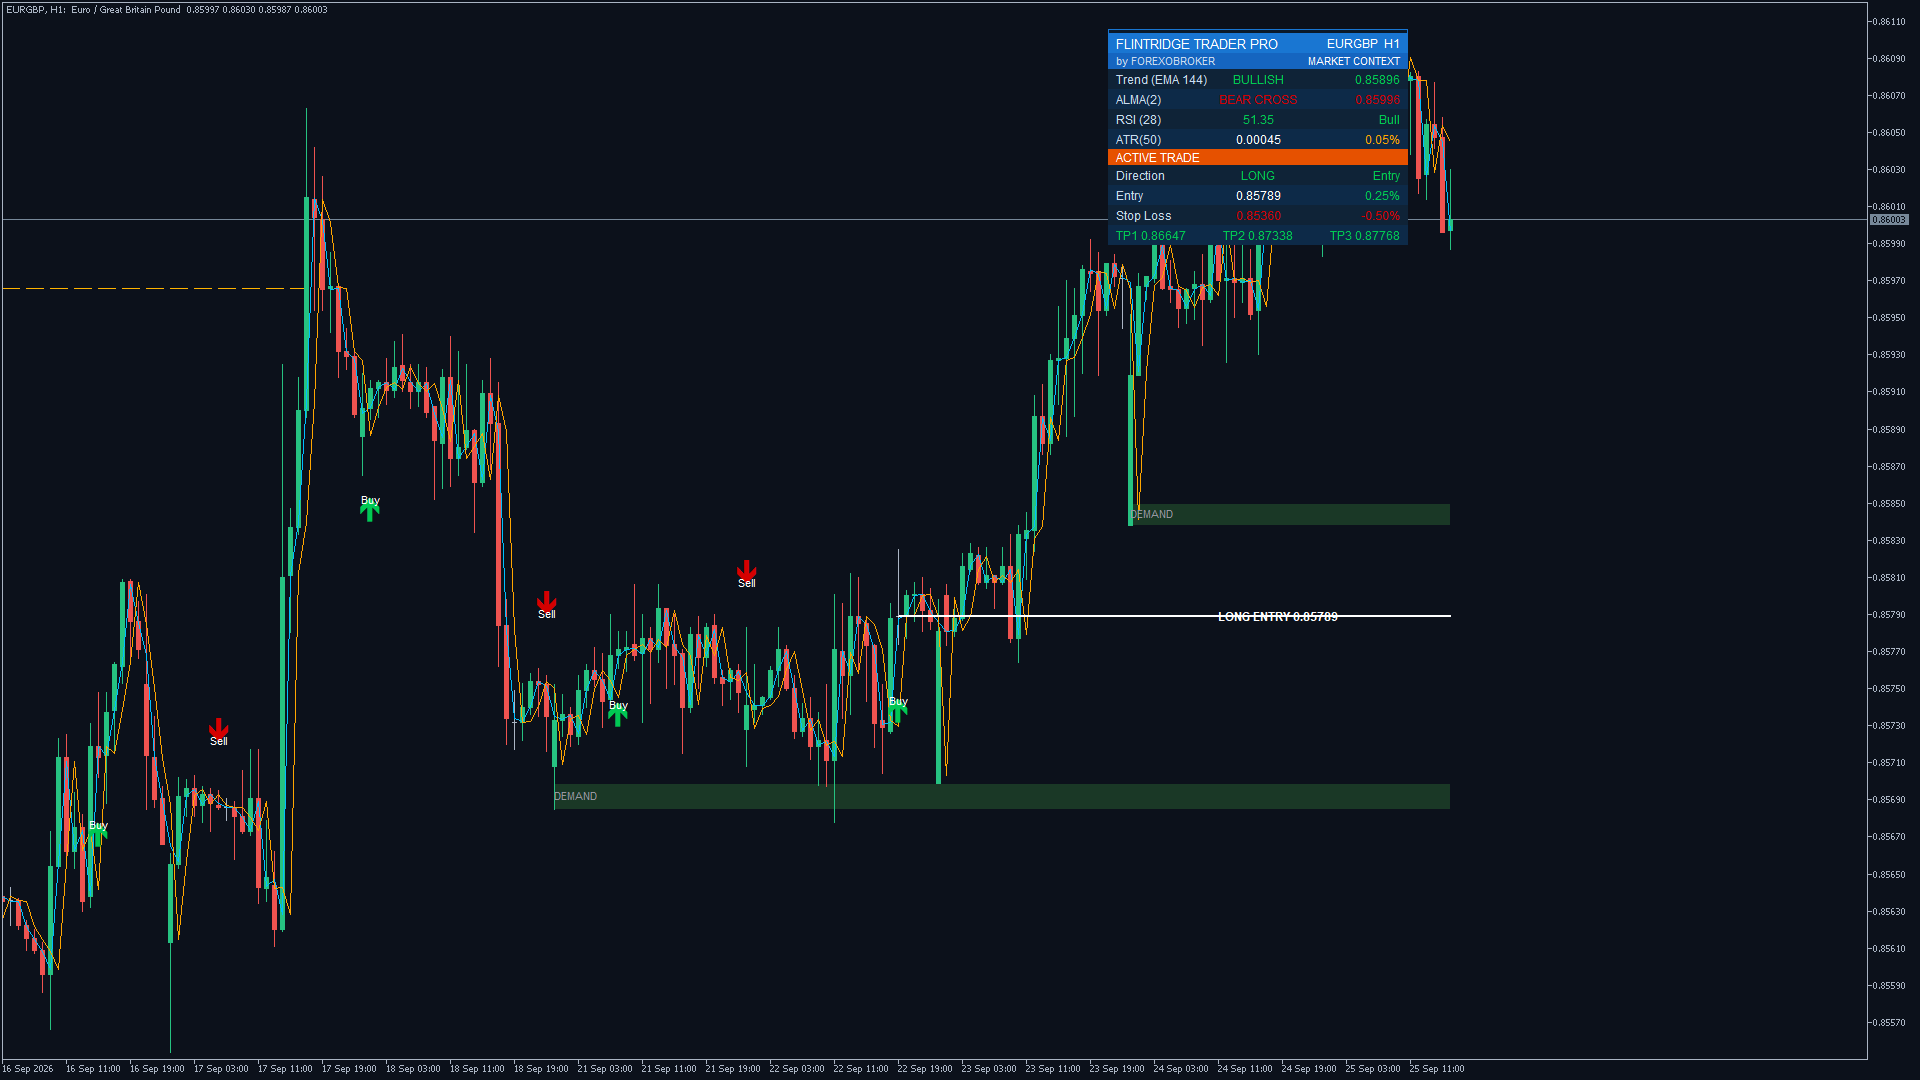
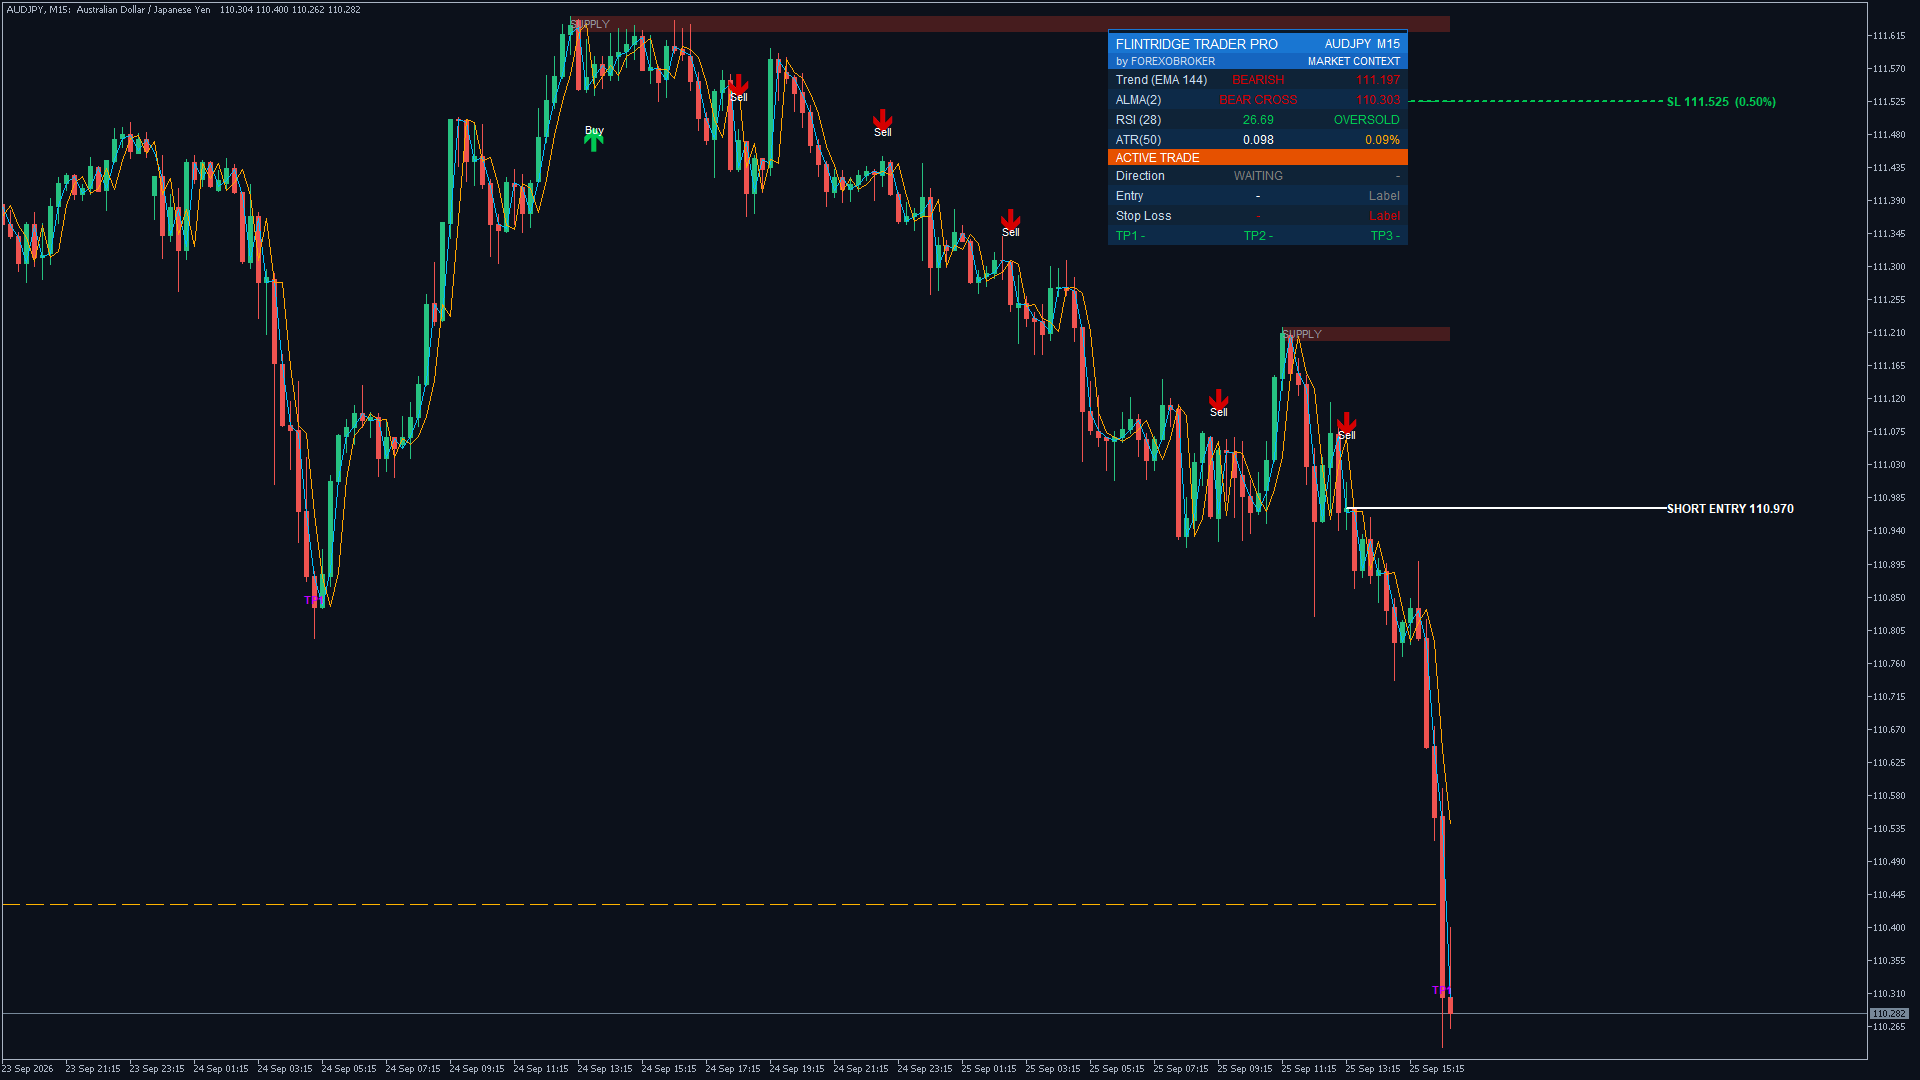
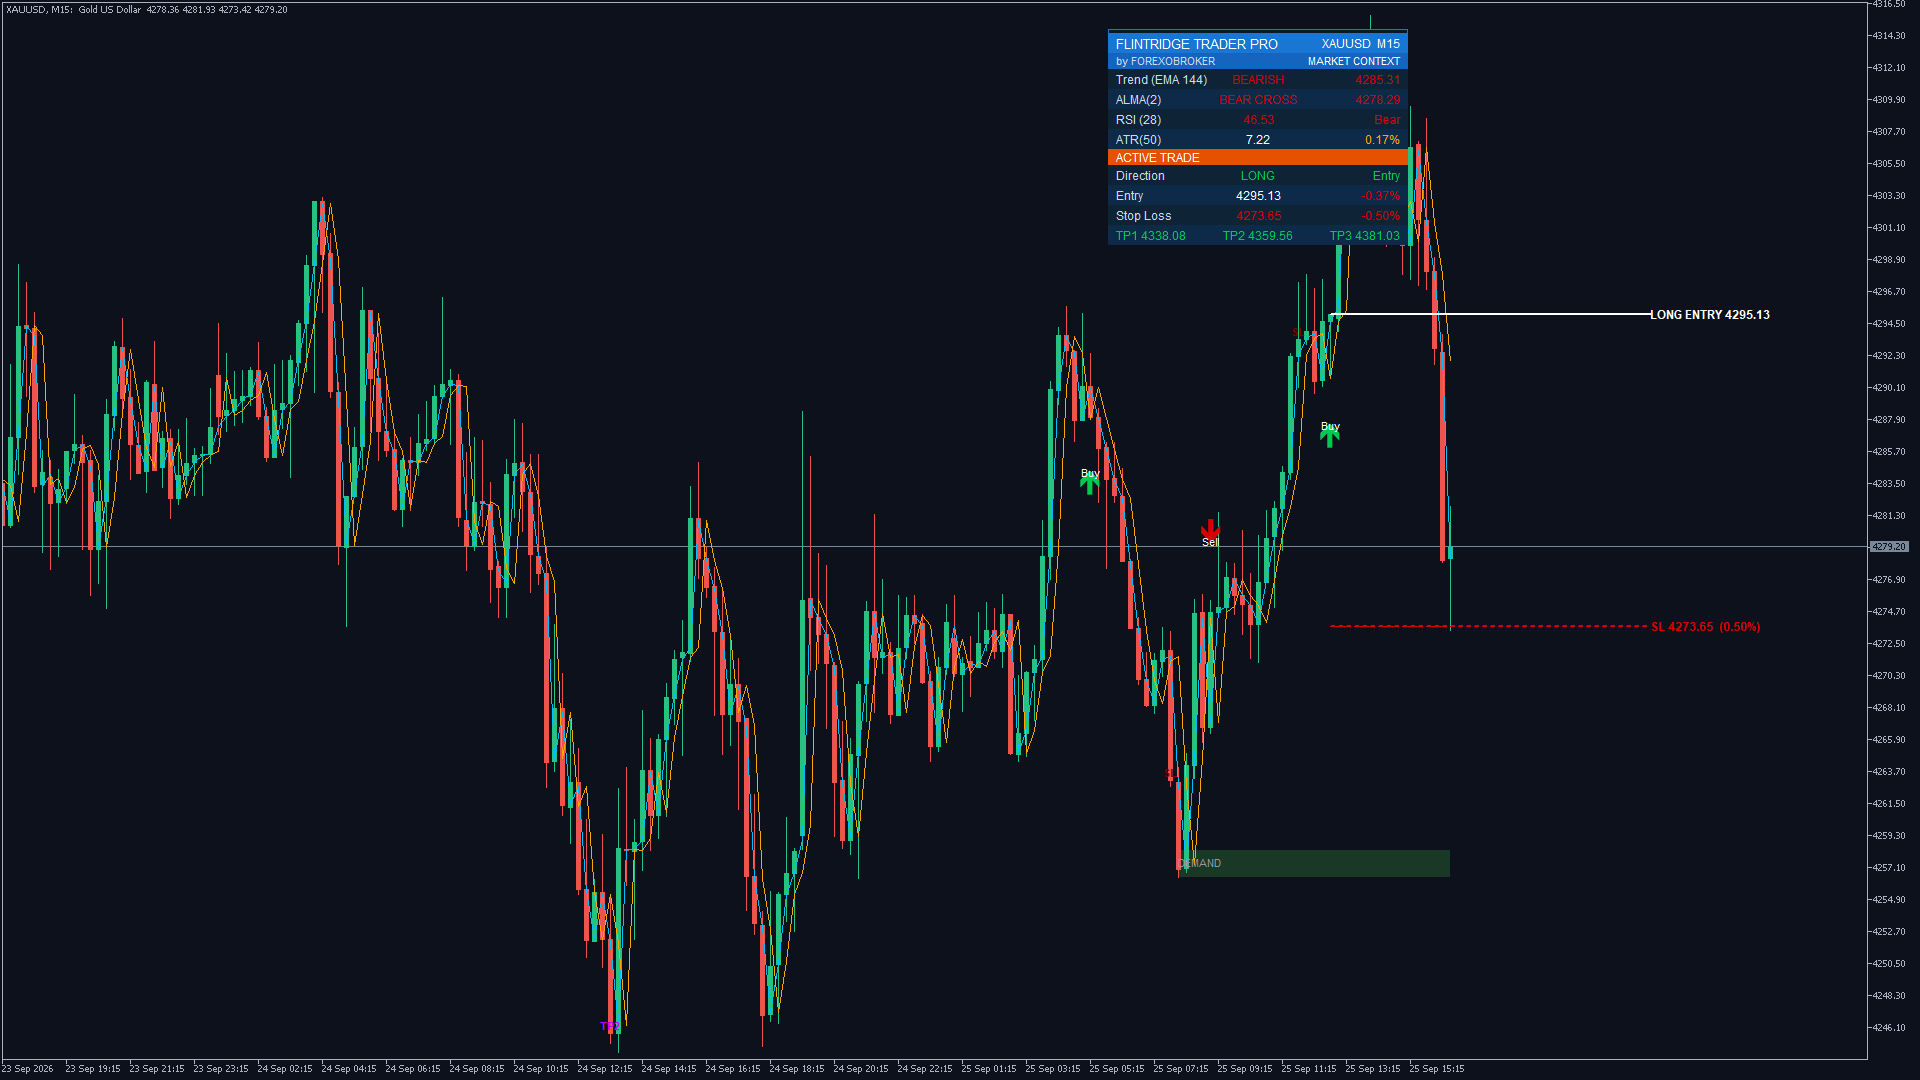
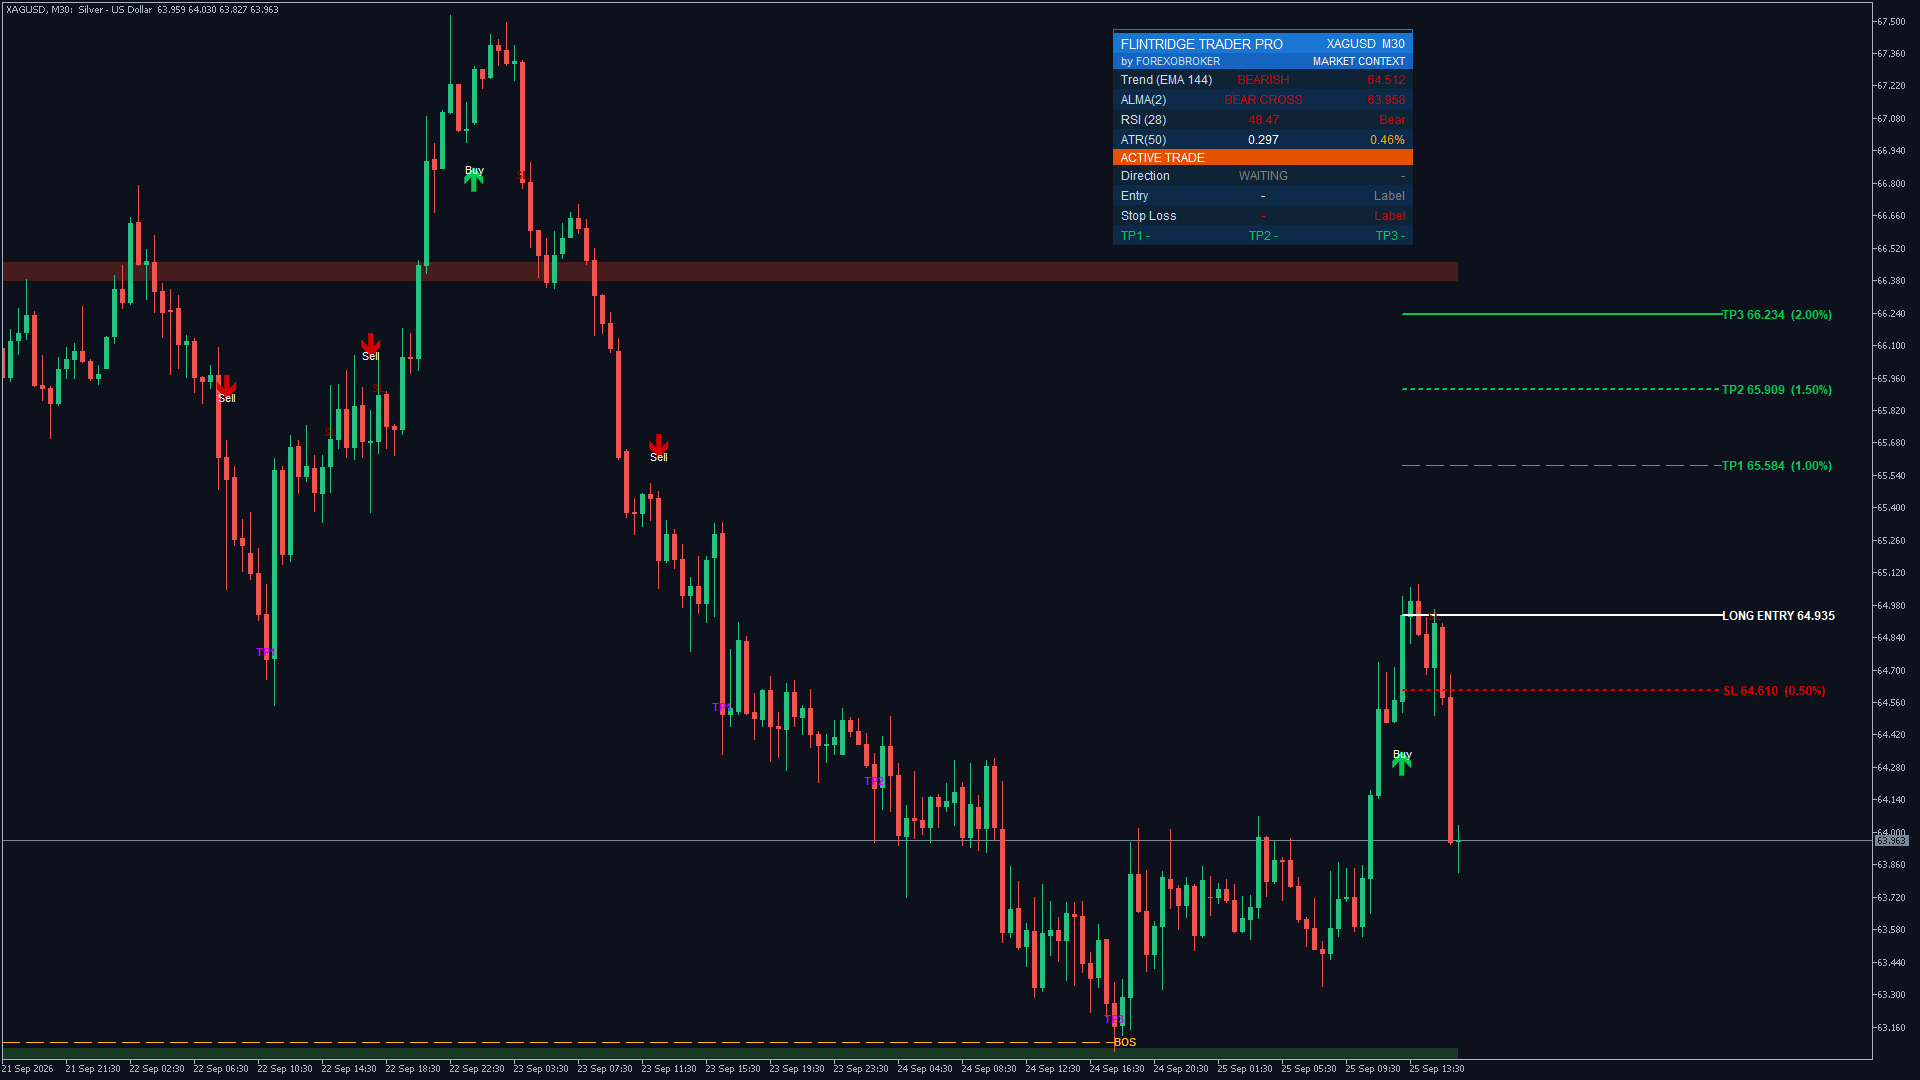
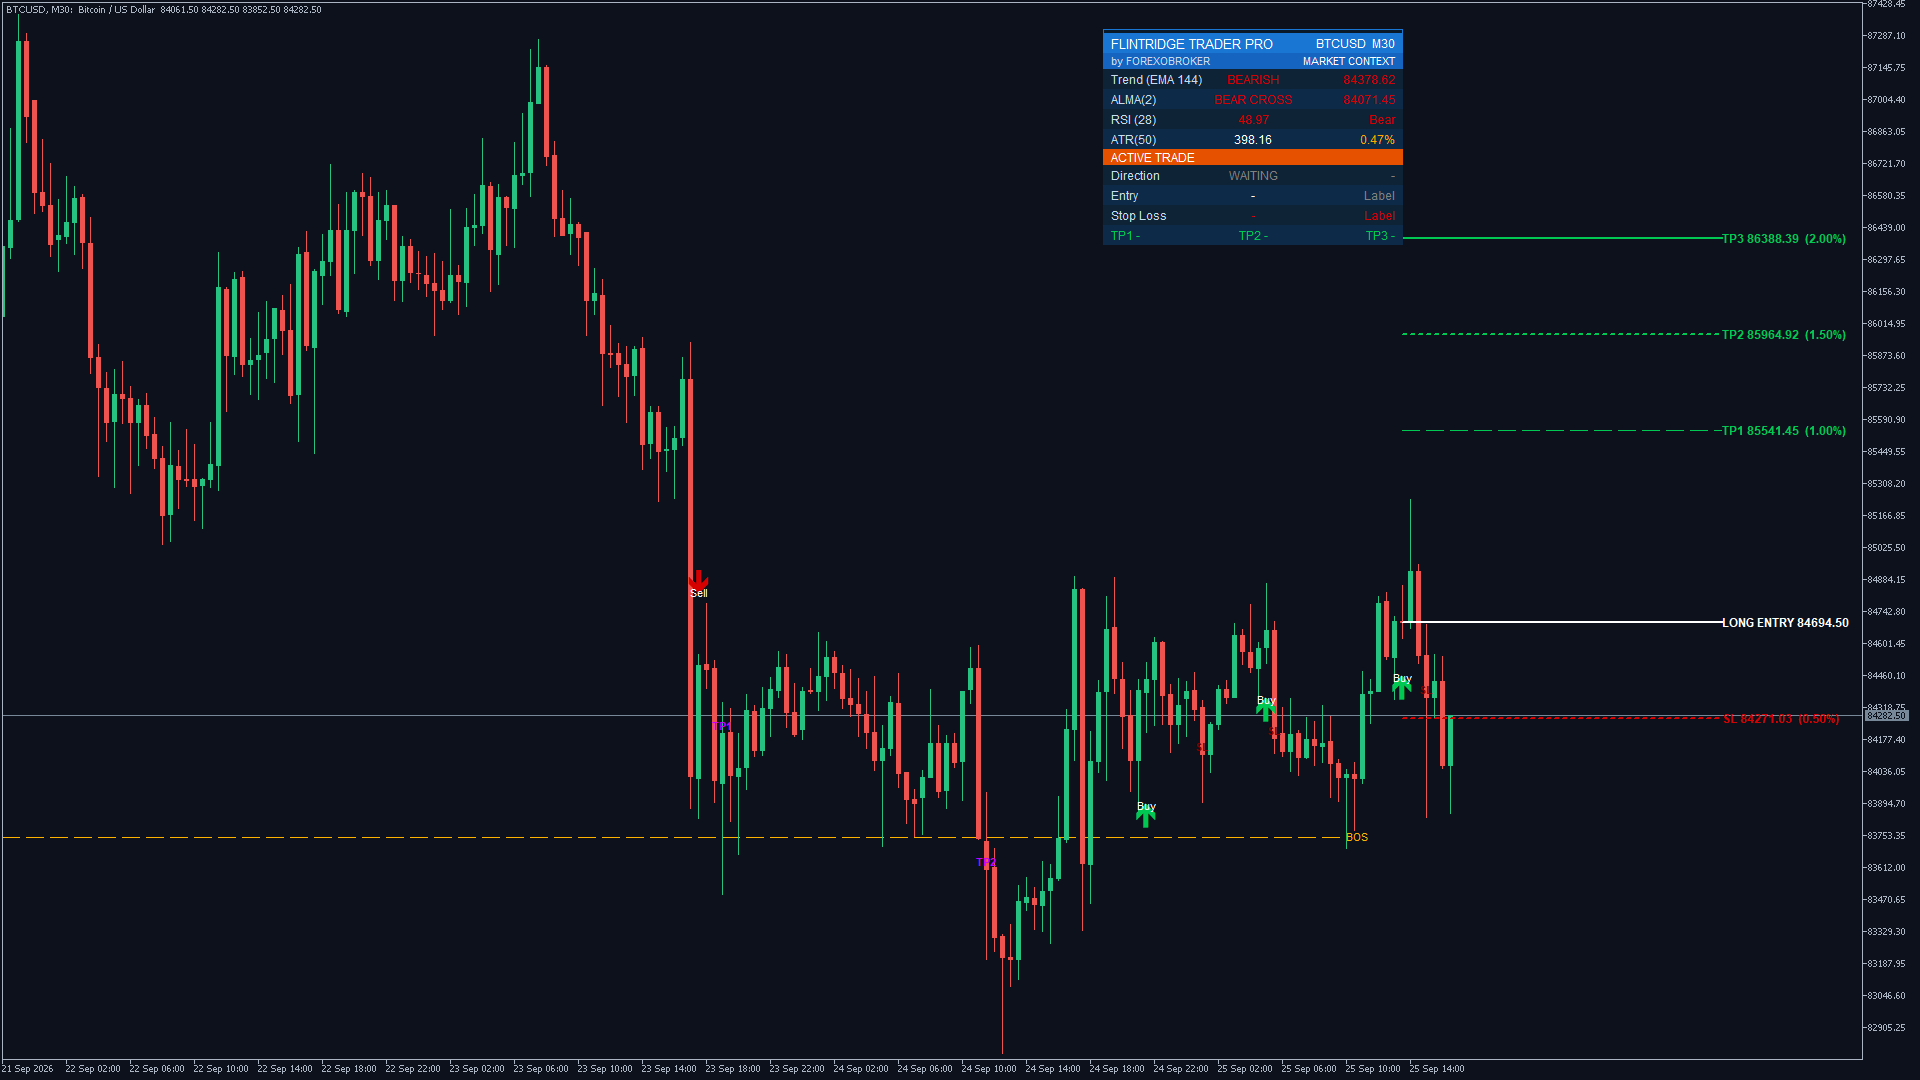
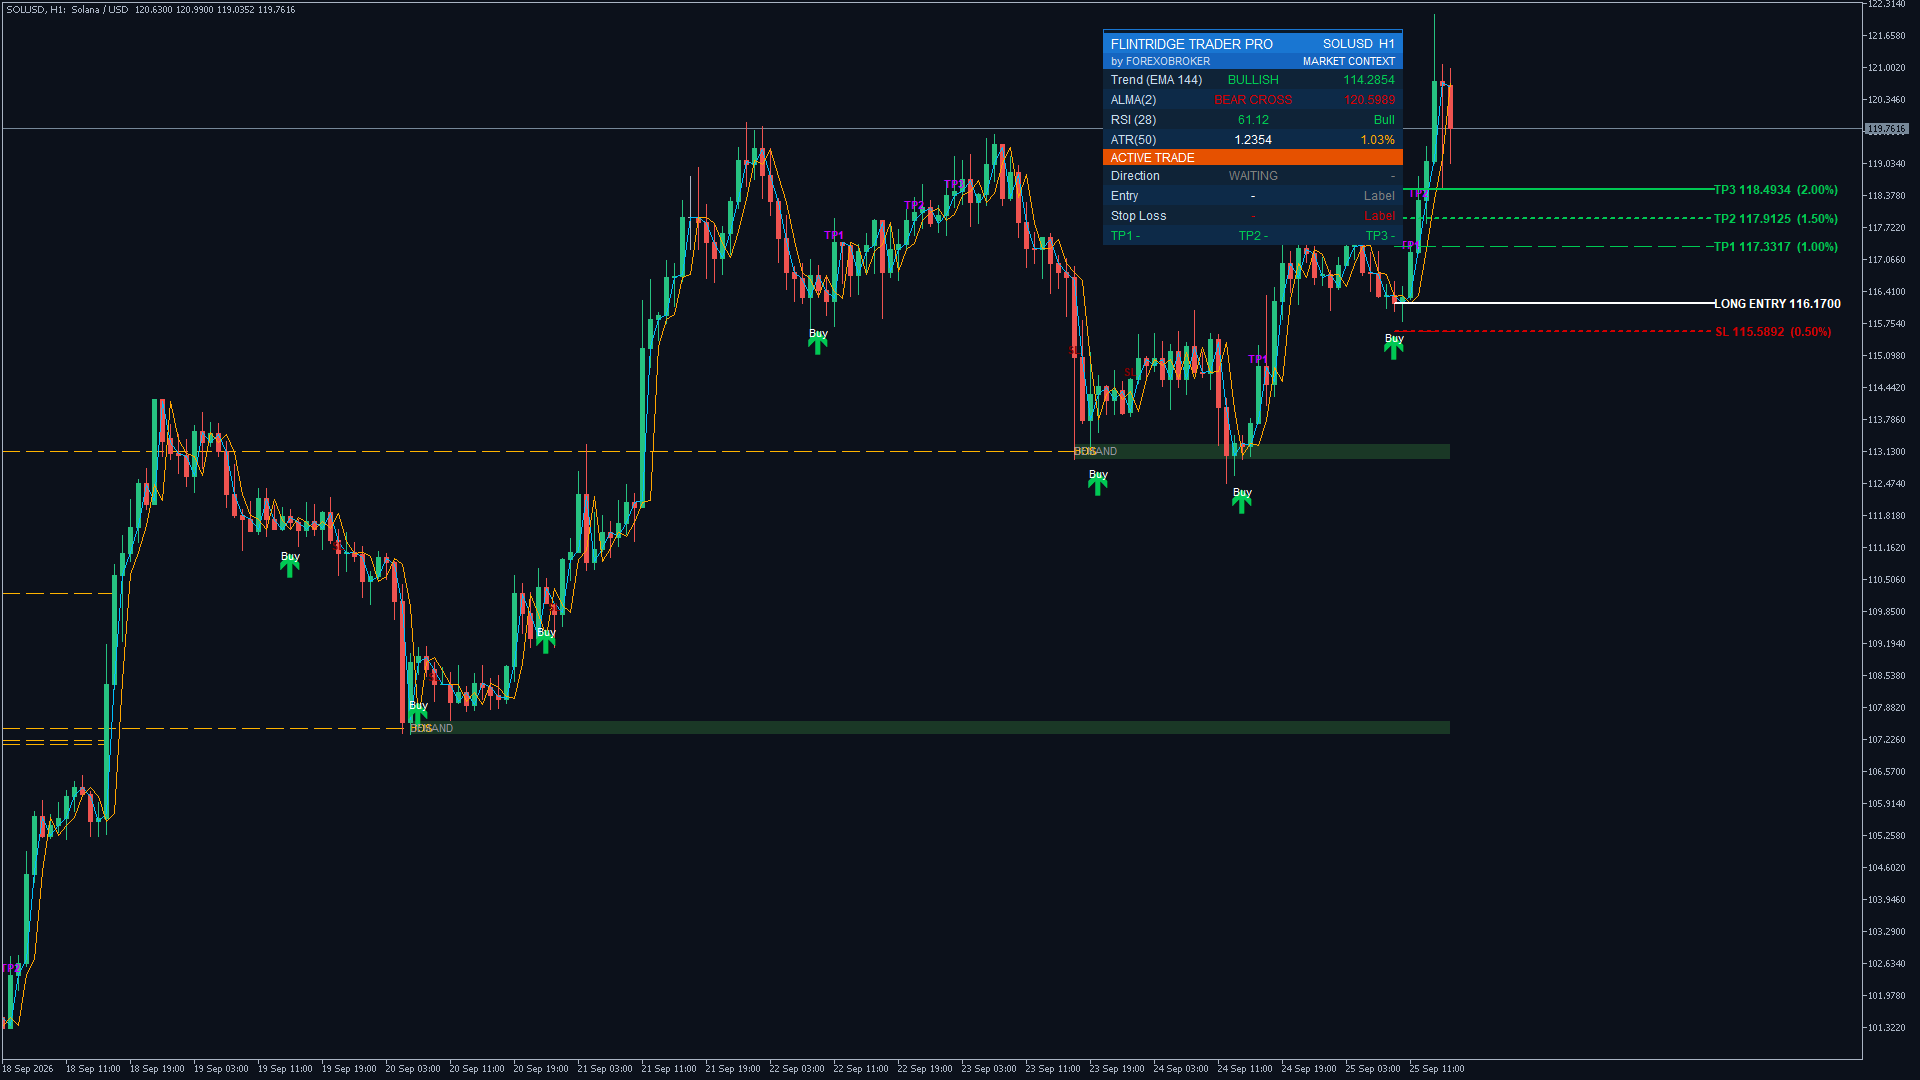
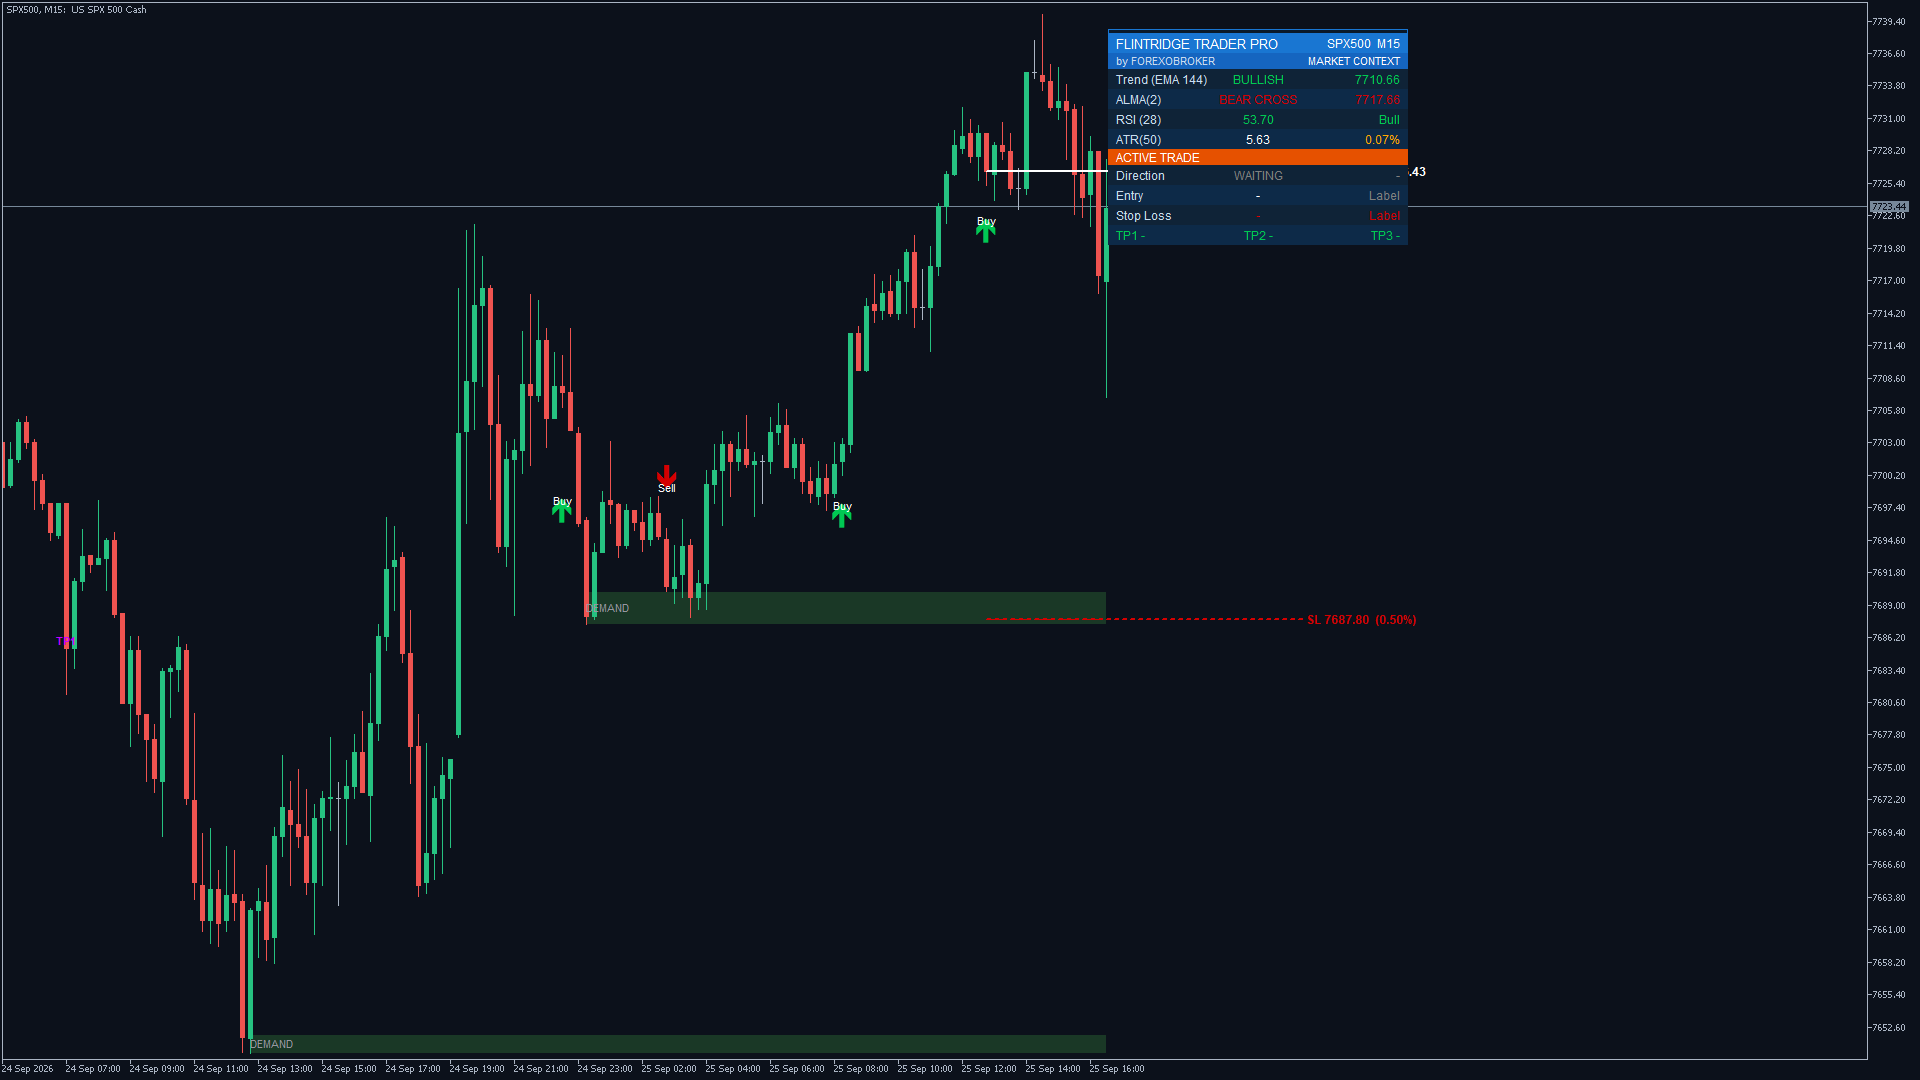
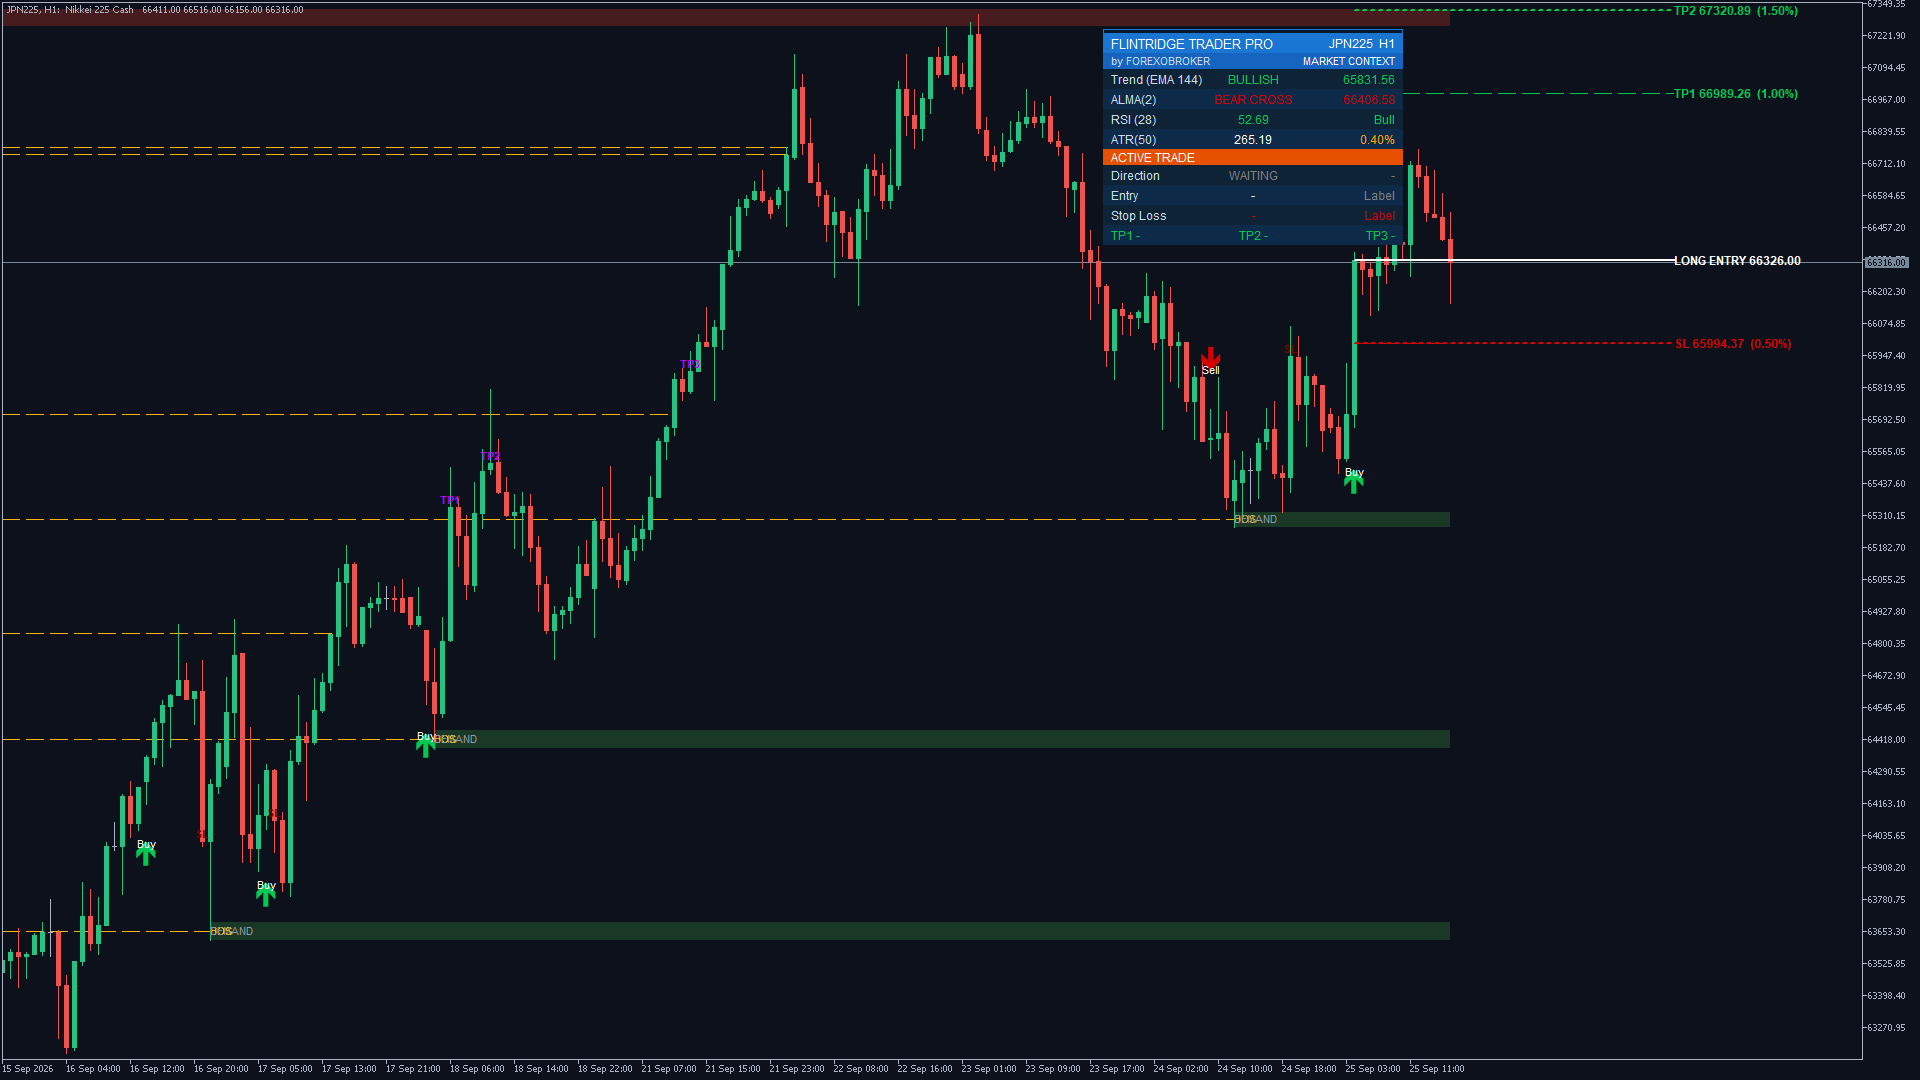
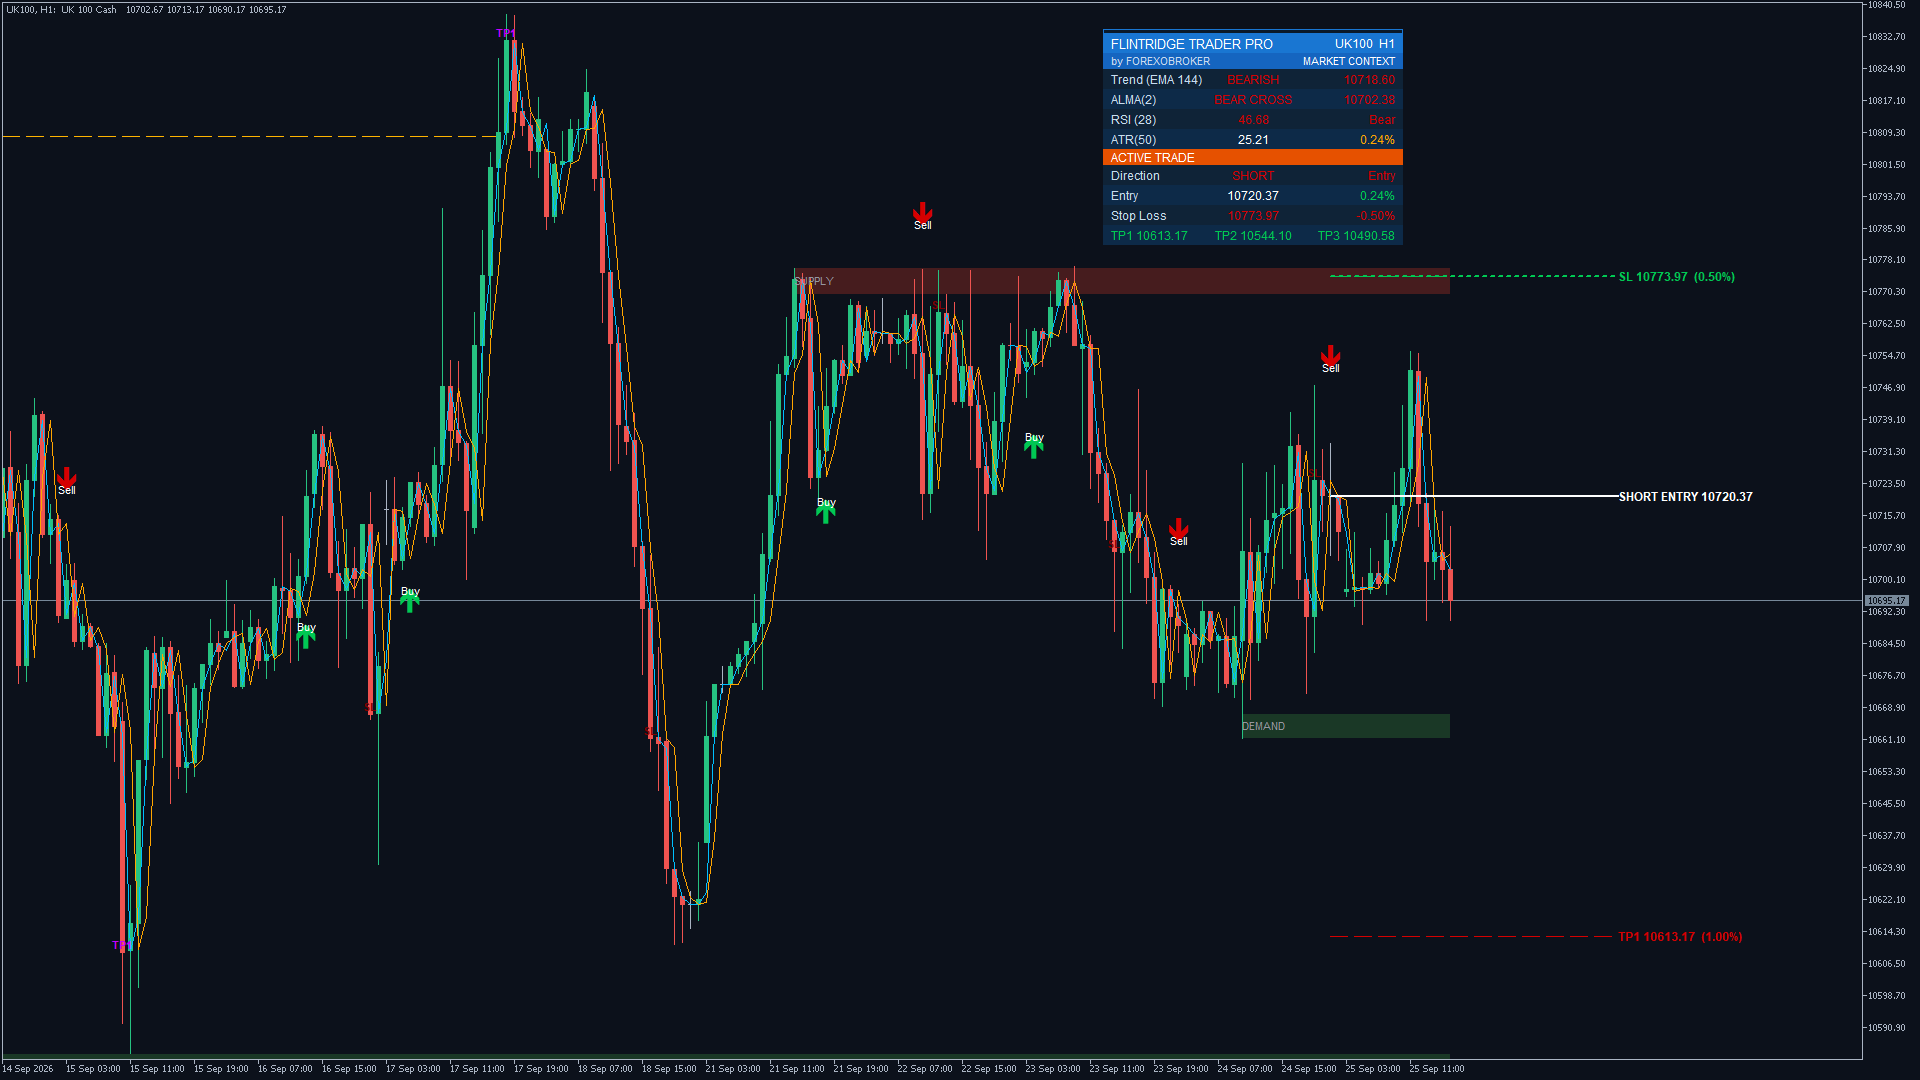
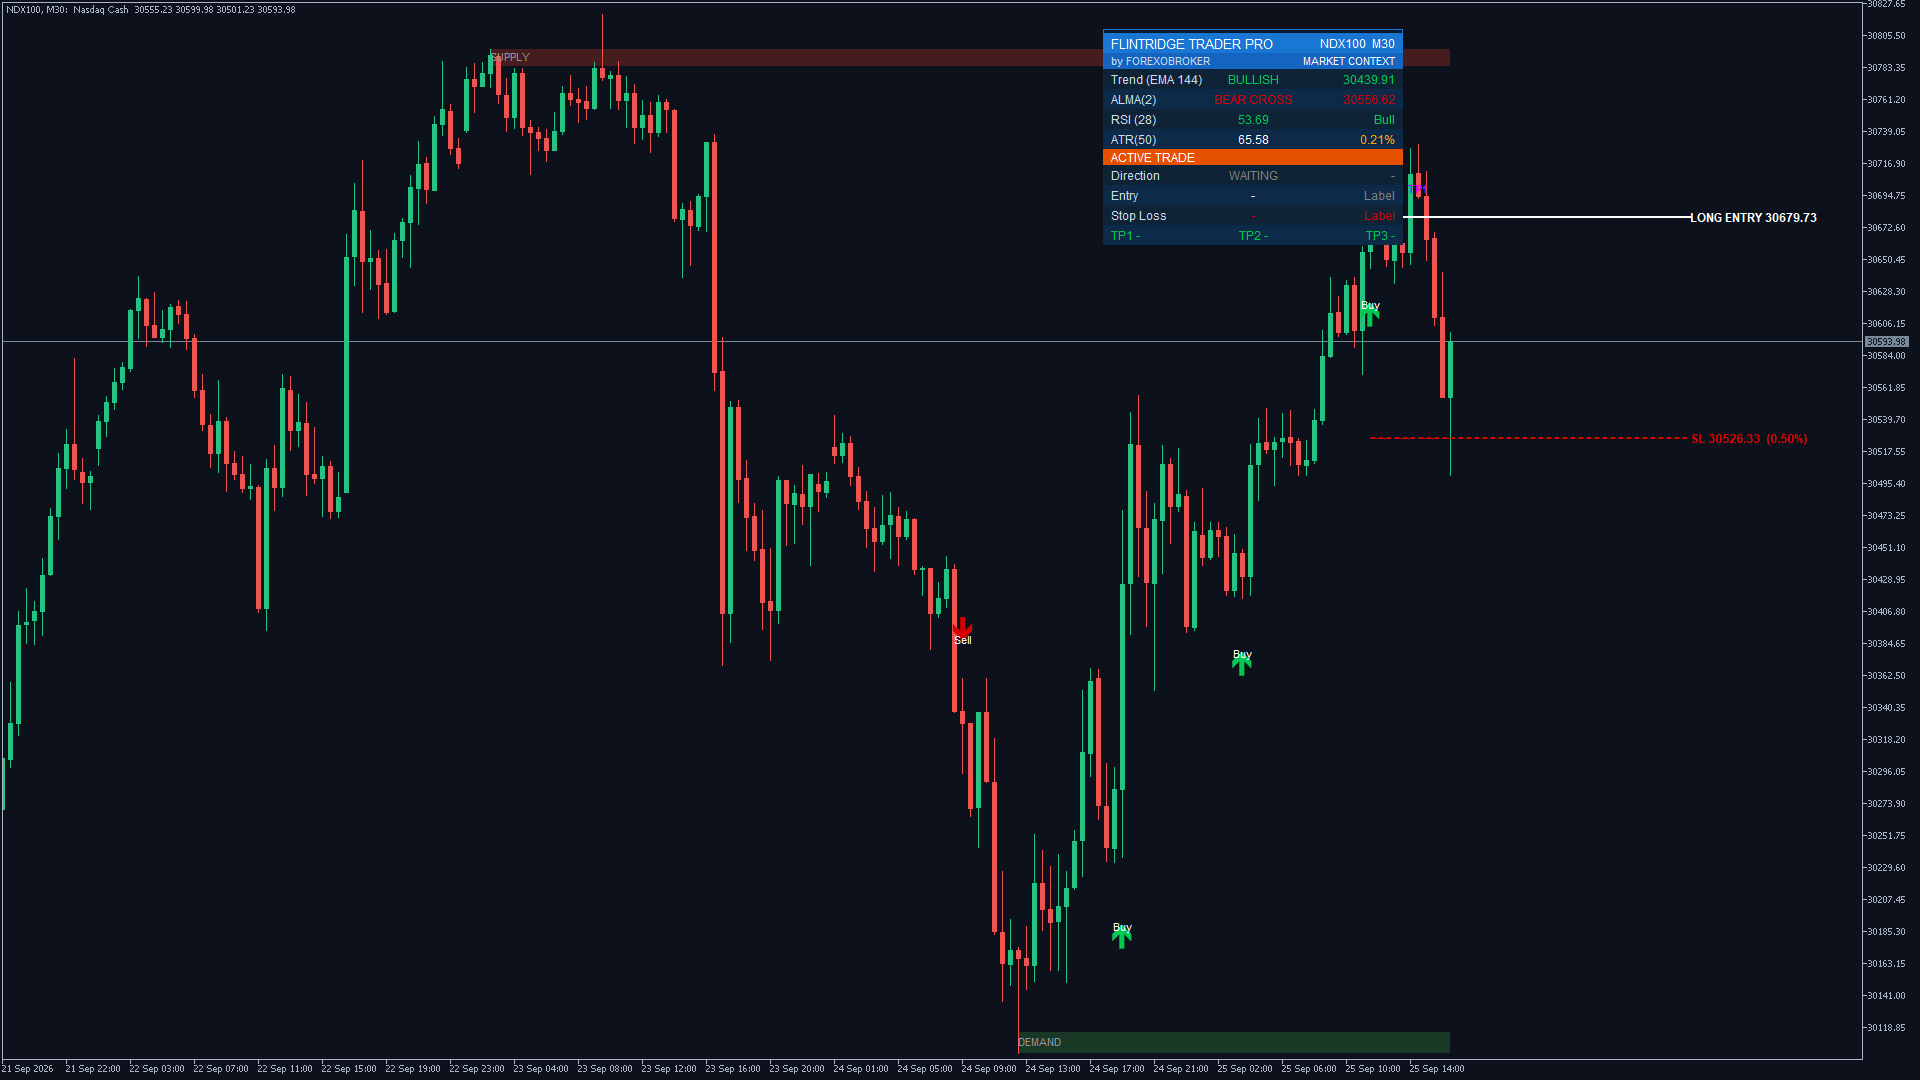
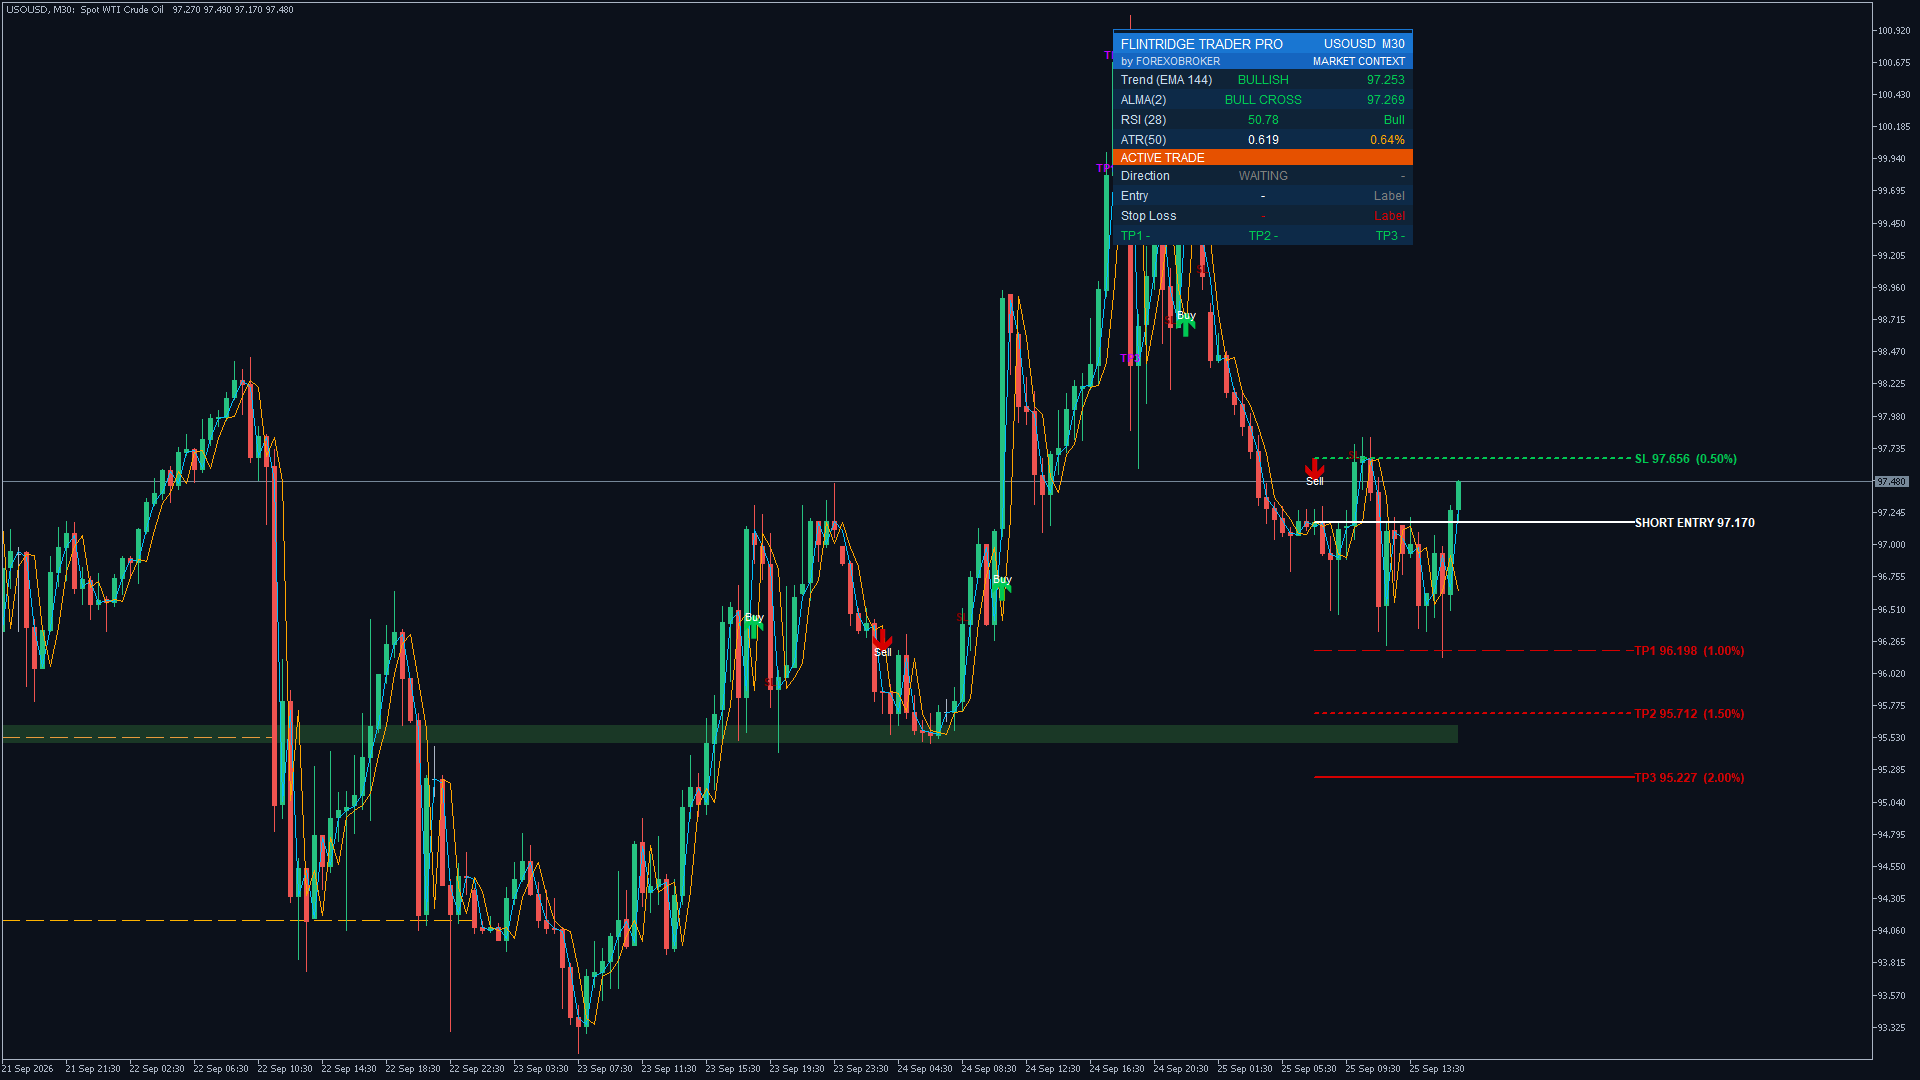
Real Flintridge Trader Pro charts captured in MetaTrader 5 on 25 September 2026, default settings, no cherry-picked inputs. Forex, metals, crypto, indices and oil. Click any image to enlarge.


A cross is not a reason to trade. Flintridge confirms it, filters it, and hands you the exit plan before you click.
Three independent checks sit between a raw crossover and a printed arrow:
Every one of these is an input. Turn a filter off to see more signals, tighten it to see fewer.
The plan is expressed as a percentage of the entry price, so the same model scales across forex, gold, indices and crypto:
The entry-to-stop distance is a known percentage before you act, so position sizing is arithmetic, not emotion.
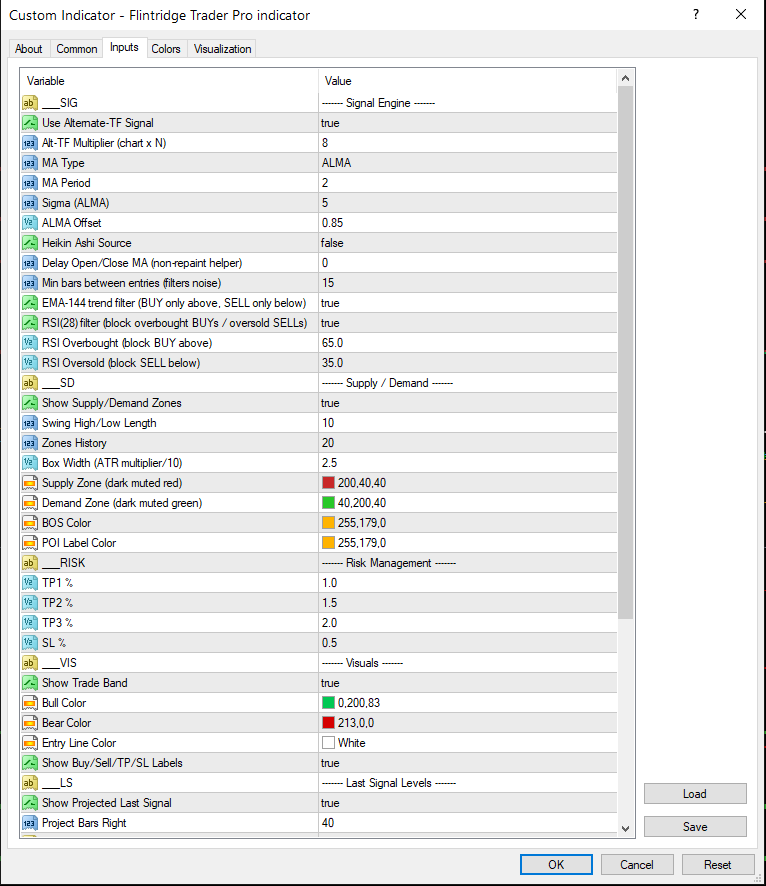
Flintridge Trader Pro is fully configurable yet sensible out of the box. Here is the complete reference: seven groups and 44 inputs, exactly as they appear in the settings window on both MT4 and MT5.
How the crossover is computed, confirmed and filtered.
| Input | Type | Default | What it does |
|---|---|---|---|
| Use Alternate-TF Signal | bool | true | Read the crossover from a higher timeframe instead of the chart timeframe. Strongly recommended on. |
| Alt-TF Multiplier (chart x N) | int | 8 | Confirmation timeframe = chart timeframe x N, rounded to the nearest of the nine standard timeframes (M15 x 8 = H1, H1 x 8 = H4). Lower for more signals, higher for fewer. |
| MA Type | enum | ALMA | Smoothing engine: ALMA (balanced), Hull (fastest) or TEMA (smoothest). |
| MA Period | int | 2 | Period of both the close-MA and the open-MA. Short by design: the engine reads candle bodies, not a long trend average. |
| Sigma (ALMA) | int | 5 | Sharpness of the ALMA Gaussian window. |
| ALMA Offset | double | 0.85 | ALMA window offset. Closer to 1.0 tracks price more tightly. |
| Heikin Ashi Source | bool | false | Feed Heikin Ashi opens and closes into the engine for smoother, fewer signals. |
| Delay Open/Close MA | int | 0 | Extra bars of delay on the MA source. An additional non-repaint buffer for cautious traders. |
| Min bars between entries | int | 15 | Signal cooldown. No new entry until this many bars have passed since the last one. |
| EMA-144 trend filter | bool | true | BUY only when price is above the EMA-144, SELL only when below it. |
| RSI(28) filter | bool | true | Block overbought buys and oversold sells. |
| RSI Overbought (block BUY above) | double | 65.0 | No BUY signal while RSI-28 is above this value. |
| RSI Oversold (block SELL below) | double | 35.0 | No SELL signal while RSI-28 is below this value. |
How structural zones are found, kept and coloured.
| Input | Type | Default | What it does |
|---|---|---|---|
| Show Supply/Demand Zones | bool | true | Draw the zones and their labels. |
| Swing High/Low Length | int | 10 | Bars on each side that define a swing pivot. Larger finds bigger, rarer zones. |
| Zones History | int | 20 | How many recent zones stay on the chart (5 to 50). |
| Box Width (ATR multiplier/10) | double | 2.5 | Zone thickness as a fraction of ATR(50), so it scales with volatility. |
| Supply Zone | color | dark muted red | Fill colour of supply zones. |
| Demand Zone | color | dark muted green | Fill colour of demand zones. |
| BOS Color | color | amber | Colour of the dashed Break of Structure line and its label. |
| POI Label Color | color | grey | Colour of the SUPPLY / DEMAND label at the zone midpoint. |
The trade plan drawn on every signal, as a percentage of the entry price.
| Input | Type | Default | What it does |
|---|---|---|---|
| TP1 % | double | 1.0 | First target, percent from entry. |
| TP2 % | double | 1.5 | Second target. |
| TP3 % | double | 2.0 | Final target. Reaching it closes the trade lifecycle. |
| SL % | double | 0.5 | Stop-loss distance, percent from entry. |
| Input | Type | Default | What it does |
|---|---|---|---|
| Show Trade Band | bool | true | Draw the entry, SL and TP1 lines of the active trade. |
| Bull Color | color | green | Colour of the close-MA line, BUY arrows and bullish dashboard values. |
| Bear Color | color | red | Colour of SELL arrows and bearish dashboard values. |
| Entry Line Color | color | white | Colour of the projected entry line. |
| Show Buy/Sell/TP/SL Labels | bool | true | Print the Buy, Sell, TP1, TP2, TP3 and SL text labels on the chart. |
| Input | Type | Default | What it does |
|---|---|---|---|
| Show Projected Last Signal | bool | true | Extend the entry, SL, TP1, TP2 and TP3 of the last signal to the right with price and percent labels. |
| Project Bars Right | int | 40 | How many bars forward the levels are projected (5 to 500). |
| Input | Type | Default | What it does |
|---|---|---|---|
| Show Dashboard | bool | true | Show or hide the on-chart panel. |
| Dashboard Corner | enum | Right Upper | Which chart corner the panel anchors to. |
| Dashboard X Offset (px) | int | 12 | Horizontal offset from the corner. |
| Dashboard Y Offset (px) | int | 26 | Vertical offset from the corner. |
| Dashboard Font Size | int | 9 | Panel text size (6 to 24). |
Native MetaTrader alerts with a master switch, per-channel and per-event control.
| Input | Type | Default | What it does |
|---|---|---|---|
| Master Alerts Switch | bool | true | Enable or disable every alert at once. |
| Popup Alerts | bool | true | The on-screen MetaTrader alert window with its sound. |
| Email Alerts | bool | false | Email through the terminal's SMTP settings (Tools, Options, Email). |
| Push Notifications | bool | false | Mobile push to the MetaTrader app via your MetaQuotes ID (Tools, Options, Notifications). |
| Alert on Entries | bool | true | Fire on Long Entry and Short Entry. |
| Alert on TP Hits | bool | true | Fire on TP1, TP2 and TP3 hits, long and short. |
| Alert on SL Hits | bool | true | Fire on stop-loss hits, long and short. |
It is almost never the lack of signals. It is the lack of a confirmed signal with context and a plan attached.
Refreshed every 1.5 seconds: market context on top, the active trade underneath, without scanning the chart.
Market context tells you whether the setup is worth taking:
Active trade tells you where you stand:
Ten events across MetaTrader's native channels: on-screen popup with sound, mobile push and email. Trade it without staring at the screen.
A master switch, three channel toggles and three event toggles control exactly what reaches you. Every message carries the event, the symbol, the timeframe and the price:
Flintridge Trader Pro: Long Entry on EURUSD H1 @ 1.14008Flintridge Trader Pro: Short TP2 hit on XAUUSD M15 @ 4262.15
Evaluations are lost to two things: an undefined stop and impulsive over-trading. Flintridge Trader Pro attacks both, and it never places an order, so you stay inside your firm's rules on automation.
No indicator can guarantee a passed challenge. What Flintridge gives you is a consistent, pre-planned trade on every signal, and consistency is what evaluations measure.
Adjust the engine, the confirmation multiplier and the risk percentages to your style. Full configurations are documented in the included PDF manual.
One engine, four very different desks. The confirmation filters and the drawn risk plan are what make it travel.
Trade crossovers only in the direction of the EMA-144 and the higher timeframe, with the stop drawn for you.
Zones, POI labels and BOS markers from the same engine, so a signal off a fresh zone is obvious.
Percentage-based risk scales from EURUSD to Bitcoin to the DAX. TEMA and H1+ keep noisy symbols clean.
Fixed stop, a cooldown against over-trading, manual execution and alerts instead of screen time.
Plenty of free tools draw two averages and fire an arrow. Almost none of them give you a confirmed, filtered, tradeable system around it.
| Capability | Generic MA Cross | Flintridge Trader Pro |
|---|---|---|
| Close-MA vs open-MA cross (reads candle bodies) | No | Yes |
| Closed-bar, non-repainting signals | Often repaints | Yes |
| Higher-timeframe confirmation built in | No | Yes |
| EMA trend + RSI filters + cooldown | No | Yes |
| Supply and demand zones with BOS | No | Yes |
| Stop-loss and three targets drawn on signal | No | Yes |
| Live dashboard with P&L and hit-tracking | No | Yes |
| 10 native alert events (popup / push / email) | Rarely | Yes |
| Both MT4 and MT5 builds included | Usually one only | Yes |
No paid reviews, no invented win-rates. Just the reasons the tool earns a place on a chart.
Higher-timeframe confirmation, two filters and a cooldown mean you see confirmed crosses, not every wobble. Fewer signals, more conviction.
The stop and three targets are computed and drawn before you act, so position sizing is a calculation, not a feeling.
Closed-bar, non-repainting. The signals on history are the signals that fired. What you review is what you would have traded.
Percentage risk and ATR-scaled zones work on GBPUSD M30, gold M15, Bitcoin H1 and the S&P 500 without per-market setup.
The dashboard summarises trend, cross, RSI, ATR and the open trade at a glance, in any corner, at any font size.
Native MetaTrader popup, push and email on every entry, target and stop. Informed, never glued to the screen.
One $47 payment. Delivered as an instant download: the MT4 build, the MT5 build and a detailed PDF manual for each platform.
Install Flintridge Trader Pro on MT4 and MT5, run it on your markets and timeframes, read the manual and test the presets. If it is not earning its place on your chart within 60 days, email [email protected] for a full refund. The risk is entirely ours.
Instant payment, instant download, then it is yours for life on both platforms.
Checkout with card via Stripe or with PayPal. One-time $47, no subscription, ever.
You land on the download page immediately: the .ex4, the .ex5 and the two PDF manuals.
File, Open Data Folder, drop the file into MQL4/Indicators (MT4) or MQL5/Indicators (MT5), refresh the Navigator.
Drag Flintridge Trader Pro onto any chart, keep the defaults or load a preset, and wait for the first confirmed arrow.
One-time payment. Lifetime updates. 60-day money-back guarantee. MT4 + MT5 in one purchase.
MetaTrader 4 & MetaTrader 5 indicator: .ex4 + .ex5 + a PDF manual for each platform
One-time payment, lifetime access
If your question is not here, email [email protected]. We reply within 24 hours, usually much faster.
A higher-timeframe checked crossover, trend and RSI filters, supply and demand zones, and a stop with three targets drawn for you, on every market MetaTrader supports. Non-repainting. MT4 + MT5 for a one-time $47.